Web Calendars keep site visitors informed about upcoming events. Any authorized user can add events to a calendar. Ektron has System, User, and Group calendars. The calendar type determines where events are stored in the database, and what permissions are needed to edit them.
|
|
System Calendar |
User Calendar |
Group Calendar |
|
Where events are stored |
Workarea > Content > Calendar Folder |
Community User Calendar |
Community Group Calendar |
|
Where events are added or edited |
The Web page or Workarea folder |
The community user’s profile Web page |
The community group’s Web page |
|
Where permissions are set |
Folder Permissions |
Community Users and Colleagues |
Community Group Membership |
|
How it appears on a Web page |
Web page with Server Control or Widget |
||
|
For more information, see |
|||
When first viewed, a Web calendar shows the current day, month, or week, whether you are on a Web page or in the Workarea. After logging in, you can add or edit calendar events if you have permission to do so.
- To select the Day, Week or Month View, click a button in the top right corner to choose the view. (The WebCalendar server control's
DisplayTypeproperty determines the appearance of these buttons. See Also: Using the WebCalendar Server Control.)
- To select the previous or next period, click the left or right arrow to move the calendar forward or backward one period of time.
- To choose a date, click the arrow to open the Date popup. Then, click a date to show on your calendar.
Adding a Calendar
Prerequisite: To add, edit or delete a calendar, you must be a member of the Administrators Group or have permission to Add, Edit, and Delete folders on the Advanced Permissions screen. See Also: Standard and Advanced Permissions
To create a system calendar:
- In the Workarea, click Content > the folder to which you want to add a calendar.
- Click New > Calendar. The Add Calendar screen appears.
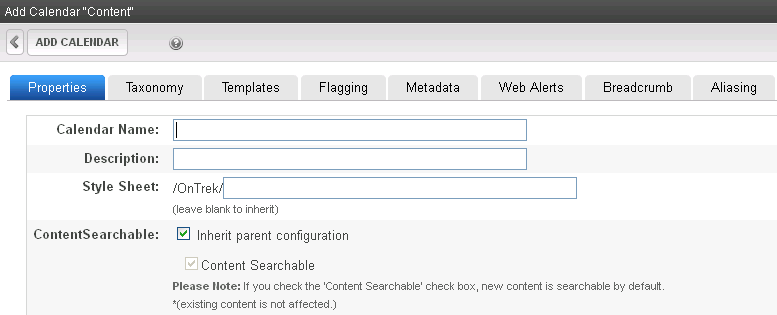
- Enter the Calendar Name.
- Enter the Description.
-
Enter a Style Sheet.—Specify a style sheet that defines styles that may be applied to event content in this folder. The style sheet must reside in the site root folder. Or, leave this field blank to inherit the parent folder’s style sheet. The style sheet populates the style drop-down list within the editor.
NOTE: This style sheet affects event content being edited. It does not necessarily affect the content’s appearance on your Web site. To set or edit the style sheet that determines your Web pages’ appearance, open the page’s Web form and place a
<link rel=”stylesheet”...tag within its<HEAD>tags. If desired, you can identify the same style sheet in both locations. To include user-selectable styles, they must be generic classes. - Set the Content Searchable value. See Also: Ensuring Your Content is Searchable
- Calendar Properties Template Tab
- Inherit Parent Template Configuration—Check this box to inherit the template from the parent content folder. Or, do not check this box and specify one or more templates below.
- Page Templates—Specify one or more templates for Calendar events in this folder. This folder’s content uses the specified template when appearing on your Web site.
- Other Calendar Properties Tabs
- Taxonomy Tab—If you want this folder to inherit taxonomy configurations from the parent folder, check Inherit Parent Taxonomy Configuration. If you uncheck Inherit Parent Taxonomy Configuration, you can then select taxonomies that can be applied to content in this folder. If you want all content in this folder to be assigned at least one taxonomy category, check Required at least one category selection. See Also: Inheriting Taxonomies from a Parent Folder; Taxonomy .
- Flagging Tab—Check this box if content in this folder inherits a flagging definition from its parent folder. If you do not check the box, use the drop-down list to apply a flagging definition to content in this folder. See Also: Defining Flags for Content, Assigning a Flagging Definition to a Folder
- Metadata Tab— See Working with Metadata.
- Web Alerts Tab—See Assigning Web Alert Information to Folders and Content.
- Breadcrumb Tab—See Creating SiteMap Breadcrumbs
- Click Add Calendar.
Note that the system calendar icon is unique (![]() ).
).
After creating a calendar, you may add events.
Adding System Calendar Events
Prerequisite: You logged into Ektron and have edit permission for the calendar. Calendars have the same permission and approval settings as folders. See Also: Managing Folder Permissions, Approval Chains
To add or edit a system calendar event:
- Navigate to your calendar from the Web page containing it or the Workarea > Content tab.
- Click any day. (You can also click New > Add Calendar Event.)
The Edit Event screen appears.
- Enter the event title into the Title text box. “Company Picnic” for example. The title appears on the calendar and in the pop-up information. To customize this pop-up, see Customizing the Web Calendar Tooltip.
- Enter the Location.
- Enter the Description.
- Specify the Start time and the All day options at the bottom of the Edit Appointment page.
- For start date, click Calendar (
 ) and set the start date.
 - For start time, enter the time text or click Clock (
 ).
).
Ektron stores event times as UTC (also known as Greenwich Mean Time—GMT). For members or visitors that login, events show in the member’s time zone. For visitors that do not log in, events show in the Web server’s time zone. For information about setting the user time zone, see Time Zone Field.
- For start date, click Calendar (
- Enter the event title into the Title text box. “Company Picnic” for example. The title appears on the calendar and in the pop-up information. To customize this pop-up, see Customizing the Web Calendar Tooltip.
- If appropriate, set recurrences. Appointments can recur daily, weekly, monthly, or yearly. They can be spaced at various intervals and have a finite duration or recur indefinitely. For example, you can set a recurring event for each Friday for the next 5 weeks.

When editing a recurring event, you are prompted to edit either the single occurrence or the series.
- Select a Taxonomy category. A typical calendar taxonomy screens events that a site visitor might wish to see. For example, a college sports Web site shows all sports, but a visitor only wants football games. To show only events related a specific category on your calendar page, use a Taxonomy. See Also: Using Taxonomy with Web Calendars.
- If desired, set Metadata for the event. See Also: Working with Metadata.
- If desired, set the event alias. See Also: Creating User-Friendly URLs with Aliasing
- Click Save. The event appears on the calendar.
Exporting Appointments to Other Calendars Using iCal
You can export Web calendar appointments to any calendar that accepts an iCalendar *.ics file. This is helpful if you want to track appointments on your Web calendar and a mobile device calendar, for example.
NOTE: Ektron uses accepted standards for producing the iCalendar ics file. This does not mean that all calendar types use the recurring appointment data properly. Contact your calendar vendor if iCalendar support is needed.
WARNING! Changes to recurring appointments do not work correctly for iCal files used in Microsoft Office 2003.
Prerequisites: You are logged into the Ektron Web site and are a member of the Administrators group or assigned the Calendar-Admin role
To export a Web Calendar event to another calendar:
- Hover over an event on the Web calendar.
- Click download. The File Download screen appears.
- Click Save and save to a folder on your computer.
- After the file is downloaded, click Open Folder.
- Double click the .ics file you saved. When you do, the appointment setting page for your default calendar opens. For example, this file name was event-997.ics.
NOTE: If you are adding the appointment to a calendar other than the default calendar on your PC, first open that calendar and import or add the *.ics file to it. For example,when using a Google Calendar, click Add then choose import. See your calendar's instructions for importing iCalendar appointments.
- Save and close this appointment. It will now appear on your calendar.
Showing Calendar Events on Activity Streams
A new or updated Calendar event appears on a Community Activity Stream if the following notification settings are checked on a user's or Membership Group's Profile > Activities tab. For more information, see Notification Message Recipients.
- Add Calendar Event
- Update Calendar Event
- Add Calendar Event
- Update Group Calendar Event
Viewing System Calendar Properties
The Calendar properties screen lets you set permissions as well as modify the calendar’s metadata, taxonomy, templates, flagging, Web Alerts and Breadcrumbs. To view a system calendar's properties:
- From the Workarea, choose Content.
- Click the calendar you wish to view. The View Events screen appears.
- Click View > Properties. The View Properties screen appears. (To edit the properties, click Edit Properties.)
To learn more about the properties, see Adding a Calendar
Using Community Web Calendars
Both community group and community user profile pages can display a Web Calendar. The following example shows a user profile page with a personal calendar.

The calendar on a personal community page obeys the same community rules as other features in the community. You can restrict the visibility of your events to only colleagues or make them public.
Creating a Calendar in My Profile
You can place a Web calendar on a user profile to track personal appointments. The following code places a WebCalendar server control on a User Profile template. You must set sourceType and dynamicParameter as shown.
<CMS:WebCalendar ID="WebCalendar1" runat="server" >
	<DataSource>
          <CMS:CalendarDataSource sourceType="UserCalendar"
             dynamicParameter="id” >
	</DataSource>
</CMS:WebCalendar>
Creating the User Calendar in the Database
To use a personal calendar, you must add it to the database. Each user needs to do this when they decide to use a calendar on their profile.
To add a user calendar to the database:
- Log in to your Web site.
- Navigate to your personal Web page or your profile.
- Click Edit Profile. In this example, Edit Profile is on a personal profile page of the eIntranet Starter Site.
Alternatively, you can log into the Workarea then go to Settings > Users > User Profile.
- When the Edit Profile window appears, click the Custom tab.
- Check Create User Calendarto create a user calendar in the database.
WARNING! After you save this profile, you cannot later uncheck this option.
- Click Save. Your calendar appears on your profile page.
Creating a Calendar in a Group
You can add a Web Calendar to any Ektron community group. The following is a sample calendar on a group page.
The calendar on a community group page obeys the same community rules as other community features. You can restrict the visibility of group events to group members, or make the calendar public.
NOTE: An alternate way to use group calendars is using the WebCalendar Widget on a group dashboard. See Using the Web Calendar Widget for more information.
The following example provides the code for placing a WebCalendar server control on a Group Profile template. You must set sourceType and dynamicParameter as shown for CalendarDataSource.
<CMS:WebCalendar ID="WebCalendar1" runat="server">
  <DataSource>
  <CMS:CalendarDataSource sourceType="GroupCalendar" dynamicParameter="id”/>
  </DataSource>
</CMS:WebCalendar>
To use a group calendar, you must add it to the database. Each group needs to do this once when they decide to have a calendar for their group.
To add a group calendar to the database:
- Log in to your Web site.
- Navigate to your group Web page.
- Choose Manage > Edit Group.
- When the Edit Group window appears, check the Create Group Calendar checkbox to create a group calendar in the database.
WARNING! After you save this profile, you cannot later uncheck this option.
- Click Save. A group calendar exists in the database and can appear on the group page.
Customizing the Web Calendar
The Web Calendar can be customized in many ways. The following examples show some ways.
Customizing the Web Calendar Tooltip
When you hover over a calendar event, a tooltip automatically shows its details.
You can change how this tooltip looks and behaves by modifying the telerik:RadToolTip properties. You can apply many changes to a tooltip, but the following example makes the tooltip appear without delay and use fade-in animation. The example below uses the EktronTech starter site.
First, add a calendar event and observe the default behavior. Then, follow these steps.
- Open the EktronTech Website file folder in your editor.
- Make a copy of the
Display.ascxandDisplay.ascx.csfiles from this foldersiteroot\workarea\WebCalendar\DefaultTemplate - Paste them into a new folder in the Web site, such as
siteroot\CustomUserControls.WARNING! You should copy these files and move them to a folder outside the
\Workareafolder. Upgrades overwrite\workareafolder files. - Edit the new .ascx file you just created.
- Change these properties on the
Telerik:RadToolTipserver control.Property
Value
Default Value
ShowDelay
0
400
Animation
Fade
None
- Save your changes.
- Edit your template.
- Update the WebCalendar server control's
DisplayTemplatePathproperty with the location of the revised display.ascx file. For example:/CustomUserControls/display.ascx. See Also: Using the WebCalendar Server Control. - Save your changes.
- Refresh the browser page containing the calendar.
- Hover over the calendar event to see the new behavior.
Customizing the Web Calendar Style Sheet
The Web calendar style sheet is WebCalendar.css. It is located in the folder siteroot\workarea\WebCalendar\View.
Modify the .RadScheduler classes to change the Web calendar's style. Below are sample changes.
|
Example |
CSS Style Change |
|
Color
|
.RadScheduler .rsDateHeader {
   font-size: 12px;
   padding: 1px 4px 3px;
   text-decoration: none;
   color: green
}
|
|
Uppercase
|
.RadScheduler .rsSpacerCell,
.RadScheduler .rsVerticalHeaderTable th,
.RadScheduler .rsHorizontalHeaderTable th {
   border-style: solid;
   text-transform: uppercase
}
|
Using the Web Calendar Widget
The calendar widget can display a combination of system, user, and group calendars. You place a Web calendar on a Web page by using either a WebCalendar server control or a Web Calendar widget. A Web Calendar widget is an easy way to add a calendar to a PageBuilder page or Smart Desktop (See Also: Personalizing the Smart Desktop.)
Adding a System Calendar to a Widget
A system calendar is one that is managed within Ektron Workarea. For more information, see Adding a Calendar.
To add a system calendar to a calendar widget:
- Click Edit (
 ) in the upper right corner of the Web Calendar widget.
 - Click the Folder tab.
- Locate the calendar to add. Note its unique icon.
- Click Save. The calendar is added to the Selected Calendars list.
Adding a User Calendar to a Widget
To add your user calendar to a Web Calendar widget:
- Click Edit () in the upper right corner of the Web Calendar widget.
- Click the User tab.
- Specify a user that has a calendar set up and click Search Users to find a person's calendar (that is available to you).
- Click Add Calendar (
 ) to add the calendar to the Calendar Widget list.
- You can choose colors for events from each user's calendar to differentiate each use on your calendar. AutoSelect uses the next available color.
- To remove any calendar, click Remove (
 ).
). - Click Save.
Adding a Group Calendar to a Widget
To show one or more Group calendars on a Web Calendar widget, follow the steps below.
- Click Edit () in the upper right corner of the Web calendar widget.
- Click the Group tab.
- Search for other group calendars by entering a group name and clicking Search Groups.
- Click Add Calendar () next to a calendar you want to add. All chosen group calendars appear on the Selected Calendars tab.
- You can choose colors for events from each user's calendar to differentiate each use on your calendar. AutoSelect uses the next available color.
- To remove any calendar, click Remove ().
- Click Save.
Using the WebCalendar Server Control
The WebCalendar server control displays Ektron calendars.
NOTE: On a PageBuilder page, use the Calendar widget to insert a calendar.
The following code example shows the WebCalendar server control.
<cms:WebCalendar ID="webcalendar" runat="server"
  DynamicParameter="calendar_id" DisplayType="Day">
  <DataSource>
     <cms:CalendarDataSource defaultId="724"sourceType="SystemCalendar"/>
    </DataSource>
</cms:WebCalendar>
The following are Ektron-specific server control properties. You can find information about native .NET properties such as font, height, width and border style in Visual Studio® help.
- AllowEventEditing (Boolean)
Determines whether users can add or edit calendar events. Default is True.
- DefaultDisplayType (String)
Specify the default calendar display. The default is Month, which means that the month view appears on the Web page. The site visitor can change the view.
- DisplayTemplatePath (String)
Specify the path to the code that controls how events are displayed. Default is blank. See Also: Customizing the Web Calendar Tooltip
- DisplayType (String)
Determines which time period choices are presented on the calendar. Choices are All, Day, Month, Week. Default is All.
- DoInitFill (Boolean)
By default, Fill occurs during the Page_Init event. Set to false if you want to postpone the fill-action until later. In this case, Fill is automatically called during the Page Render event. You might do this if you need to set or change a property on the control in code-behind and have it render with your changes shown.
- DynamicParameter (String)
To make this calendar dynamic, select calendar_id. When you do, this server control uses the calendar passed as a URL parameter. To exclude this function, choose None- Use Default. Only Calendars with
sourcetype=SystemCalendarmay be used in the querystring for this value. For example, whereDyanamicParameter=”calendar_id”, the URL may readhttp://mysite.com/calendar.aspx?calendar_id=”55”. In this case, calendar 55 must be of the SystemCalendar type. - Hide (Boolean)
Hides or displays the output of the control in design time and run time.
- True—Hide the control output.
- False—Display the control output.
- Language (Integer)
Set a language for viewing content; shows results in design-time (in Visual Studio) and at run-time (in a browser).
- SuppressWrapperTags (Boolean)
Suppresses the output of the span/div tags around the control.
- True—Suppress wrap tags.
- False (default)—Allow wrap tags.
- WrapTag (String)
Lets a developer specify a server control’s tag.
- Span (default)—designate an inline portion of an HTML document as a span element.
- Div—apply attributes to a block of code.
- Custom—Lets you use a custom tag.
The following list shows properties set inside the <DataSource> <CalendarDataSource> tag.
- backColor (String)
The background color of the calendar event. If you set this value to
AutoSelect, the next available color in the list is chosen automatically. - defaultId (String)
The Id of the SystemCalendar, GroupCalendar or UserCalendar to display on the Web page. For more information about using this property, see Combining Web Calendars (Mashups).
- queryParam (String)
The parameter that may be in the query string to mash-up additional calendars. This can be any Calendar SourceType. For example, if the value is set to uid, then the querystring can be:
.../calendar.aspx?calendar_id=”55”&uid=”440”For more information about using this property, see Combining Web Calendars (Mashups)
- sourceType (String)
Choices are SystemCalendar, GroupCalendar, UserCalendar. See Also: Combining Web Calendars (Mashups)
NOTE: The CategoryID property set inside the
<DataSource> <CategoryID>tag is used to identify taxonomy categories to filter calendar events. See Also: Using Taxonomy with Web Calendars
Combining Web Calendars (Mashups)
A Calendar Mashup combines events from different calendars into one calendar view. As an example, you could combine company meetings from one calendar with a special seminar series from another.
The ways to combine calendar events are described below.
Combining Calendars Using the Dynamic Method
The dynamic method uses the URL query string parameter to specify a calendar. This method maintains one calendar template that can display many calendars on your site. The following example uses the EktronTech starter site. The exercise combines calendars using a URL whose query parameter is cal2: http://<servername>/ektrontech/calendar.aspx?cal2=376
To combine 2 calendars:
- Create 2 calendars in the workarea. See Also: Adding a Calendar
- Determine each calendar's ID number by examining its properties. This example uses calendar folder IDs 88 and 376.
- Edit the
calendar.aspxtemplate that contains the Web calendar. In this example, the template is located on the Web server in this folder:d:\inetpub\wwwroot\EktronTech. - Add 2
CalendarDataSourcetags: one for a static calendar, the other for a dynamic calendar.- In the first (static)
CalendarDataSourceproperty, adddefaultId = “88”. - In the second (dynamic)
CalendarDataSourceproperty, addqueryParam = “cal2”. This lets you display any calendar referenced in the query string.
- In the first (static)
- In both
CalendarDataSourcetags, set thesourceType = “SystemCalendar”property. The finished code looks like this.<cms:WebCalendar ID="webcalendar" runat="server" DynamicParameter="calendar_id" DisplayType="All" SuppressWrapperTags="True"> <cms:WebCalendar ID="webcalendar" runat="server" DynamicParameter="calendar_id" DisplayType="All" SuppressWrapperTags="True"> <DataSource> <cms:CalendarDataSource defaultId="88" sourceType="SystemCalendar"/> <cms:CalendarDataSource queryParam="cal2" sourceType="SystemCalendar"/> </DataSource> </cms:WebCalendar> - Save
calendar.aspx. - Enter the following URL to see the calendar:
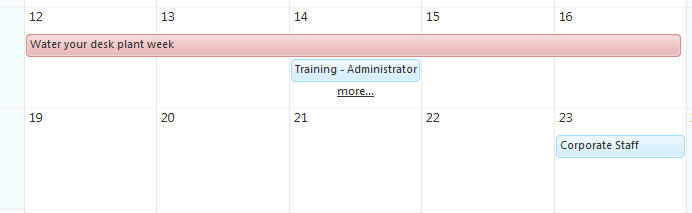
http://<servername>/ektrontech/calendar.aspx?cal2=376You see the combined calendar events. If there are too many events to show on a date, clock more... to see all events.
Combining Calendars Using the Static Method
The static method of combining calendars "hard codes" calendar id numbers instead of using a query string parameter. This method creates a calendar whose event source does not change dynamically.
- Create 2 calendar folders in the workarea. See Also: Adding a Calendar
- Determine the ID number for each calendar by examining the Calendar Folder properties.
- Edit the
calendar.aspxtemplate. - In the
CalendarDataSourceproperties, add defaultId values for each calendar as shown.<cms:WebCalendar ID="webcalendar" runat="server" DynamicParameter="calendar_id" DisplayType="All" SuppressWrapperTags="True"> <DataSource> <cms:CalendarDataSource defaultId="88" sourceType="SystemCalendar"/> <cms:CalendarDataSource defaultId="376" sourceType="SystemCalendar"/> </DataSource>In this example, events for calendars 88 and 376 are combined on the
calendar.aspxpage.
Combining a Static Mashup and Dynamic Parameter
The following example displays a calendar according to a dynamic parameter in the query string. If the query string parameter is not used, the calendar shows a mashup of 3 calendars. The following example assumes you created 3 calendars with IDs 88, 374, and 376.
This is the code for the events.aspx template.
<cms:WebCalendar ID="webcalendar1" runat="server">
  <DataSource>
    <cms:CalendarDataSource sourceType="SystemCalendar" >
    </cms:CalendarDataSource>
  </DataSource>
</cms:WebCalendar>
This is the code-behind which tests for a query parameter. If none is found, display a static calendar mashup.
events.aspx.vb
‘This code is located in the Page_Load event
Protected Sub Page_Load(ByVal sender As Object, ByVal e As System.EventArgs) Handles Me.Load
  ‘Create a CalendarDataSource instance and set the sourceType and queryParam
  Dim cds As New Ektron.Cms.Controls.CalendarDataSource()
  cds.queryParam = "calid"
  cds.sourceType = Ektron.Cms.Controls.SourceType.SystemCalendar
  ‘Add the DataSource object
  webcalendar1.DataSource.Add(cds)
  ‘If the queryString is used, show that calendar, otherwise show the following mashup
  If (Request.QueryString("calid") = String.Empty) Then
    ‘Create three CalendarDataSource instances and
    add the sourceType and defaultId for each.
    cds = New Ektron.Cms.Controls.CalendarDataSource()
    cds.sourceType = Ektron.Cms.Controls.SourceType.SystemCalendar
    webcalendar1.DataSource.Add(cds)
    cds = New Ektron.Cms.Controls.CalendarDataSource()
    cds.sourceType = Ektron.Cms.Controls.SourceType.SystemCalendar
    cds.defaultId = 88
    webcalendar1.DataSource.Add(cds)
    cds = New Ektron.Cms.Controls.CalendarDataSource()
    cds.sourceType = Ektron.Cms.Controls.SourceType.SystemCalendar
    cds.defaultId = 376
    webcalendar1.DataSource.Add(cds)
  End If
‘Fill and return
webcalendar1.Fill()
End Sub
events.aspx.cs
//This code is located in the Page_Load event
protected void Page_Load(object sender, System.EventArgs e)
{
  //Create a CalendarDataSource instance and set the sourceType and queryParam
    Ektron.Cms.Controls.CalendarDataSource cds = new Ektron.Cms.Controls.CalendarDataSource();
    cds.queryParam = "calid";
    cds.sourceType = Ektron.Cms.Controls.SourceType.SystemCalendar;
  //Add the DataSource object
    webcalendar1.DataSource.Add(cds);
  //If the queryString is used, show that calendar, otherwise show the following mashup
    if ((Request.QueryString("calid") == string.Empty)) {
      //Create three CalendarDataSource instances and add the
      //sourceType and defaultId for each.
      cds = new Ektron.Cms.Controls.CalendarDataSource();
      cds.sourceType = Ektron.Cms.Controls.SourceType.SystemCalendar;
      webcalendar1.DataSource.Add(cds);
      cds = new Ektron.Cms.Controls.CalendarDataSource();
      cds.sourceType = Ektron.Cms.Controls.SourceType.SystemCalendar;
      cds.defaultId = 88;
      webcalendar1.DataSource.Add(cds);
      cds = new Ektron.Cms.Controls.CalendarDataSource();
      cds.sourceType = Ektron.Cms.Controls.SourceType.SystemCalendar;
      cds.defaultId = 376;
      webcalendar1.DataSource.Add(cds);
    }
    //Fill and return
    webcalendar1.Fill();
}
To see a single calendar such as 376, use this URL:
http://<server>/cms400developer/events.aspx?calid=376
To see all calendars together, do not use the query string parameter.
http://<server>/cms400developer/events.aspx
Using Taxonomy with Web Calendars
You can use taxonomy categories to filter calendar events. Calendar categories could include meeting rooms, audience, or whether the event should appear on a special public calendar. The following example organizes events based on locations and audience. See Also: Introduction to Creating a Taxonomy
After you create a taxonomy, you can assign its categories to events.
Use a CategoryID value in the CalendarDataSource to filter events according to taxonomy categories. In the following example, the calendar shows events for the Training Center (category 123) or Administrators (category 124).
<cms:WebCalendarID="webcalendar"runat="server">
  <DataSource>
    <cms:CalendarDataSourcedefaultId="726"sourceType="SystemCalendar">
    <CMS:CategoryIDcategoryId="123"/>
    <CMS:CategoryIDcategoryId="124"/>
    </cms:CalendarDataSource>
  </DataSource>
</cms:WebCalendar>
By using an ID of a higher category in the taxonomy tree, you can show all events under it. For example, this taxonomy has 2 higher level branches with ID 100 and 200.
If you set the category ID to 100, you see any events associated with categories 100, 111 or 112.
![]()