NOTE: Internet Explorer cannot accommodate more than 32 style sheets in one page. This problem can easily affect PageBuilder pages, because each widget may include one or more style sheets, and a page can host any number of widgets.
Creating a PageBuilder Wireframe
You first create a wireframe. Next, define the dropzone, one or more areas of the page on which a content creator drags and drops widgets. The relationship between a wireframe, a dropzone, and a widget is illustrated below.
To create a wireframe that contains one dropzone:
- Open the Web site in Visual Studio.
- Choose Web Site > Add New Item to add a new Web form to the site.

- Select Web Form.
- Set the Name to
PageLayout.aspx, the Language to Visual C#, and check Select master page.
- Click Add, then change to Source view.
- Register the user controls directly below the @Page directive (at the top of the file).
<%@ Register Assembly="Ektron.Cms.Controls" Namespace="Ektron.Cms.Controls" TagPrefix="CMS" %>
<%@ Register Src="~/Workarea/PageBuilder/PageControls/PageHost.ascx" TagPrefix="PH" TagName="PageHost" %>
<%@ Register Src="~/Workarea/PageBuilder/PageControls/DropZone.ascx" TagPrefix="DZ" TagName="DropZone" %>
<%@ Register Assembly="Ektron.Cms.Widget" Namespace="Ektron.Cms.PageBuilder" TagPrefix="PB" %>
- Add code for a PageBuilder Menu (PageHost) and Dropzone. To do this, locate the ContentPlaceHolder1 and enter this code.
WARNING! When inserting the following code, begin the
<ColumnDefinitions>statements with the prefix on the widget assembly registration line (PBin the example above). Do not use IntelliSense when entering<ColumnDefinitions>statements—it may insert an incorrect prefix.<PH:PageHost ID="PageHost1" runat="server" DefaultPageID="937" SelTaxonomyID="94" /> <DZ:DropZone ID="Middle" runat="server" AllowAddColumn="false" AllowColumnResize="false"> <ColumnDefinitions> <PB:ColumnData width="100" columnID="0" unit="pixels"> </PB:ColumnData> <PB:ColumnData width="100" columnID="1" unit="pixels"> </PB:ColumnData> <PB:ColumnData width="100" columnID="2" unit="pixels"> </PB:ColumnData> </ColumnDefinitions> </DZ:DropZone>With the PageBuilder menu (PageHost) and Dropzone in place, the template looks like this when you are logged in and ready to configure a PageBuilder page.
This control lets a content author drop widgets on the page. It also provides the save/check in/publish functions, and lets the author preview how the page will look when it's published. The content author uses a Dropzone control as a placeholder, into which you insert widgets. You also can use it to insert additional placeholders as needed.
NOTE: See Advanced PageBuilder Tasks for information on customizing user controls.
The
pagelayout.aspxcode now looks like this.
NOTE: Add only one dropzone now. Add more later.
Best Practice
Set values for the
FolderIDandSelTaxonomyIDproperties. See Assigning a Default Page to a Wireframe and Assigning a Default Taxonomy Category to a Wireframe. - Open the code-behind page,
PageLayout.aspx.cs. - Add a reference to the PageBuilder namespace by adding the following line after the last using statement.
using Ektron.Cms.PageBuilder. - Inherit the PageBuilder class instead of System.Web.UI.Page. To do this, change:
public partial classPageLayout : System.Web.UI.PageTo:
public partial classPageLayout : PageBuilder - Add the following code after the Page_Load event to handle errors and notifications.
NOTE: You can copy the following code from
siteroot/cms400developer/developer/pagebuilder/pagelayout.aspx.cs.public override void Error(string message) { jsAlert(message); } public override void Notify(string message) { jsAlert(message); } public void jsAlert(string message) { Literal lit = new Literal(); lit.Text = "<script type=\"\" language=\"\">{0}</script>"; lit.Text = string.Format(lit.Text, "alert('" + message + "');"); Form.Controls.Add(lit); }You do not need to use the jsAlert system defined here, but if you do not you must add overrides to handle errors and notifications.
The code page for
pagelayout.aspx.cslooks like this.
- Save the
PageLayout.aspxandPageLayout.aspx.csfiles.
Enabling Manual Aliasing
|
Best Practice Enable Manual and Auto aliasing. |
Make sure that manual aliasing is enabled within Ektron. Doing this lets you apply a user-friendly URL when you are creating a PageBuilder page.

NOTE: See “URL Aliasing for more information.
To enable manual aliasing:
- In the Ektron Workarea, choose Settings > Configuration > URL Aliasing > Settings.
- Click Edit.
- Check the Manual box and click Save.
Adding the Wireframe and Widgets into Ektron
The Ektron administrator uses the wireframe that developers made available in the Workarea. The administrator also determines which widgets will be available on this wireframe.
- In the Workarea, choose Settings > Configuration > Template Configuration.
- Click Add New Template to System. The Add a New Template screen appears.
- Click
 and navigate to
 PageLayout.aspx, the wireframe you created earlier in Creating a PageBuilder Wireframe. - Click the PageBuilder Wireframe check box, which tells Ektron that this template can be used to create a PageBuilder page. Widgets that can be applied to the template appear. Ektron provides many standard widgets. See Widget Reference
- Click the ContentBlock and List Summary widgets. The background color changes.
- Click Add New Template to System.
Assigning the PageBuilder Wireframe to a Folder
Create a folder for the content that appears on the new page by performing these steps.
- Click Content in the Ektron Workarea. The folders appear in the left panel.
- Click the Root folder.
- In the View contents panel, choose New > Folder.
NOTE: You should keep content and PageBuilder pages in separate folders, so you can later create and configure a folder called “Content.” The content folder will contain content blocks and other assets, and sub-folders.
- Access the folder properties for the new folder.
- In the Name field, type Pages.
- Assign the template that you created earlier as the default (and only) template for this folder. This ensures that only PageBuilder pages can be created in this folder.
- Click the Templates tab.
- Uncheck the Inherit parent configuration option and click OK at the prompt.
NOTE: For more information about folder inheritance, see Managing Folder Permissions.
- Select
PageLayout.aspxfrom the template list in the pulldown menu. This is the wireframe you created earlier. - Click Add (
 ) to the right of the pull-down menu.
 PageLayout.aspxis added to the list of page templates. - Delete
CMSlogin.aspxfrom the list to ensure that no content is placed in the folder. - Select
PageLayout.aspx(the default option, circled below) and click Add Folder.
Follow steps 3 through 6 to create a folder for content. However, instead of assigning pagelayout.aspx as the template, assign a template used to create Ektron content.
Creating the New PageBuilder Page
Create a PageBuilder page. For example, at AcmeBooks.com, there is a pressing need to market a new series of mystery novels from an up-and-coming Australian novelist. So, the Marketing team needs to quickly create a Web page to announce the new series. Here’s how they build the page with PageBuilder.
WARNING! When you edit PageBuilder pages in the Ektron Workarea via Internet Explorer, version 7 or higher is required.
- Click the Pages folder, which you created in Assigning the PageBuilder Wireframe to a Folder.
- Choose New > Page Layout.
The Add New Page screen appears. (Because only one template is assigned to the folder, it appears as the default.)
- Click Next. A new screen appears. This lets you assign a title, Taxonomy, and aliasing information to the page.
- Enter
New Australian Mystery Seriesin the Page Title field. - By default, the Manual Alias matches the Page Title. Change it to
Australian_Mystery.By changing the Alias field, you give the new page a user-friendly name. For example, by default, the page’s name is
www.acmebooks.com/new_mystery_series.aspx. The alias Australian_Mystery lets the page display aswww.acmebooks.com/Australian_Mystery. - Click Next. The following screen appears, which lets you assign metadata and a summary to the page. See Also: Writing a Summary for Content; Working with Metadata
- Click Finish. A confirmation dialog box appears. Click OK.
Placing Widgets on the Page
NOTE: For information about how to create a widget, see Creating the “Hello World” Widget.
After the page is created, a new page opens. It contains 1 dropzone, which consists of 2 columns. The top of the page contains a PageBuilder menu to perform actions on the page, such as check in, view properties, and drop widgets onto the page. To keep the menu open, click the pin icon (![]() ).
).

The following image shows the page with a 2-column layout.
- The left column is 35% wide and displays a list of all content in the Marketing folder. Web site visitors use the list to access all Marketing collateral.
The right column is 65% wide and displays a single content block.
Step 1: Add New Column and Set Column Widths
Add a second column to the right of the top one. Then, they set the width of both columns.
NOTE: If your developer set dropzone’s column widths programmatically (as explained in Setting a Dropzone’s Column Width Programmatically), you cannot add a column as described here.
- Click Add Column (
 ) and a new column appears to the right of the existing one.
- Set the left column width to 35% by clicking the pencil icon.
- Enter 35 into the New Width field, change the measurement to Percent, and click Save.

- Set the right column to 65% width by clicking the pencil icon, changing its width to 65 Percent, and clicking Save.
Step 2: Insert New Content Block Widget into Right Column
When the columns are set, insert a ContentBlock widget into the right column.
- From the PageBuilder tool bar, open the Widget menu (
 ). The Widget menu appears, showing the widgets that the Web site administrator assigned to the page wireframe in Creating a PageBuilder Wireframe.
- Drag and drop the Content Block widget to the right column. The Content Block Control appears in the column.
- Click Edit (Pencil icon). The Editing Widget screen appears.
- Click New. The Edit Content screen appears.
- In the Title field, enter
New Australian Mystery Series. - In the content area, enter text about the series of books, and click Publish.
When published, the content appears in the column.

- When you want to edit content on this page, click the Access Point (
 ). A menu displays.
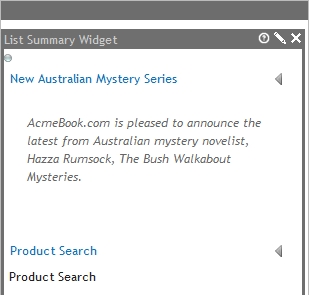
Step 3: Insert a List Summary Widget into Left Column
After you insert content in the right column, insert a List Summary widget in the left column.
- From the PageBuilder menu, open the Widget menu (). Widgets assigned to the page wireframe in Creating a PageBuilder Wireframe appear.
- Drag and drop the List Summary widget into the column. The List Summary widget appears displaying a list summary for content in the root folder.
- Click the pencil icon.
The Editing Widget screen appears.
- Click the Folder tab and choose the Root > Mainsite > Content > Products folder.
- Clicks Save. The list summary shows the content from the folder.
- From the PageBuilder menu, choose File > Check In. You can review the page in Preview mode and make sure it is formatted properly. If you need to change it, choose File > Edit from the PageBuilder menu.
Advanced PageBuilder Tasks
Customizing the PageBuilder Menu Control
By default, when a site user creates a new PageBuilder page from an existing one, it is saved to the same Ektron folder. For example, consider this folder/content structure.
Root (folder id 0)
Products (folder id 20)
  PageLayout: “Omaha Mailorder Steaks” (content id 35)
Services (folder id 30)
If you are viewing content id 35 and click New Page or Copy/Save as, the new page is saved to that content’s folder (Products, folder id= 20).
NOTE: When you create a new page layout from the Workarea, you first select a folder then begin creating the page layout.
Use the PageBuilder control’s FolderID property to override the default and specify an Ektron folder to which new pages are saved. Here is an example of that property:
<ucPageBuilder:PageHost ID="ucPageHost1" FolderID="25" runat="server" />
When a user is working on a page that hosts this PageBuilder control, and he saves a new page, it is saved to folder id 25.
Use the CacheInterval property to cache a page and its Widgets that represent Ektron server controls, such as a Collection Widget.
This property sets the amount of time, in seconds, that data is cached. The default is 0 (zero).
<ucPageBuilder:PageHost ID="ucPageHost1" CacheInterval="25" runat="server" />
Customizing the Dropzone User Control
Several properties let you customize the dropzone user control’s behavior.
Letting Users Add Columns to a Dropzone
Use the AllowAddColumn property to let users add columns to a dropzone.
<ucPageBuilder:DropZone ID="ucDropZone1"
  AllowAddColumn="true"
  AllowColumnResize="true" runat="server" />
For example, a Dropzone initially contains one column, but the page creator wants 3. If this property is set to true, this change is possible. This property’s default value is true.
NOTE: If you set dropzone’s column widths programmatically (as explained in Setting a Dropzone’s Column Width Programmatically), the user will not be able to add a column, regardless of this setting.
Letting Users Resize a Dropzone
Use the AllowColumnResize property to let users change the width of columns in a dropzone.
<ucPageBuilder:DropZone ID="ucDropZone1"
  AllowAddColumn="true"
  AllowColumnResize="true" runat="server" />
For example, column width is 100% by default. A page creator wants to change it to 50%. If this property is set to true, this change is possible. This property’s default value is true.
NOTE: If you set dropzone’s column widths programmatically (as explained in Setting a Dropzone’s Column Width Programmatically), the user will not be able to add a column, regardless of this setting.
Setting a Dropzone’s Column Width Programmatically
To set a dropzone’s column widths programmatically:
- Add the following
Registerstatements to the page’s<head>tags.WARNING! The Widget and Dropzone assemblies must have the same Tag Prefix. See example.
<%@ Register Assembly="Ektron.Cms.Widget"
  Namespace="Ektron.Cms.PageBuilder" TagPrefix="PB" %>
<%@ Register Src="~/Workarea/PageBuilder/PageControls/PageHost.ascx"
  TagPrefix="PB" TagName="PageHost" %>
<%@ Register Src="~/Workarea/PageBuilder/PageControls/DropZone.ascx"
  TagPrefix="PB" TagName="DropZone" %>
<%@ Register Assembly="Ektron.Cms.Widget"
  Namespace="Ektron.Cms.PageBuilder" TagPrefix="PB"%>
- Within the page’s
<body>tags, add the following code. The following example adds 3 columns of 100 pixels each.<PB:DropZone ID="Middle" runat="server"> <ColumnDefinitions> <PB:ColumnData width="100" columnID="0" unit="pixels"></PB:ColumnData> <PB:ColumnData width="100" columnID="1" unit="pixels"></PB:ColumnData> <PB:ColumnData width="100" columnID="2" unit="pixels"></PB:ColumnData> </ColumnDefinitions> </PB:DropZone>
Set width to an appropriate number. For the unit, the options are
- pixels
- percent
- em
If you set a dropzone’s column widths programmatically, you must also set the AllowAddColumn and AllowColumnResize properties to false. If you do not, users working with widgets can add columns and adjust column widths on the page, but their changes will revert to these settings when they try to save.
Assigning a Default Page to a Wireframe
You can assign a default page to a wireframe. If you do, and a site visitor enters a URL with a path to that wireframe that lacks a query string ID, the default page appears. The following example explains this feature.
- The following URL returns PageLayout ID 1036 in the PageBuilder folder:
http://siteroot/cms400developer/developer/PageBuilder/PageLayout.aspx?pageid=1036 - The following URL returns the Page Layout page identified in the
PageLayout.aspxfile’s PageBuilder menu user controlDefaultPageIDproperty.http://siteroot/cms400developer/developer/PageBuilder/PageLayout.aspx(Note lack of query string parameter)
To assign a default page to a wireframe:
- In the Ektron Workarea, create a PageBuilder page that will be used as the default pageid for a wireframe.
- In Visual Studio, open the wireframe file assigned to that folder.
- Find the PageBuilder menu user control (circled below).
- Add a new property,
DefaultPageID. - For the property’s value, enter the ID of the page you created in Step 1.
Here is an example of that line with the
DefaultPageIDproperty added.<ucPageBuilder:PageHost ID="ucCms400Developer" DefaultPageID=”1035” runat="server" /> - Save your changes.
To continue the above example, if someone opens a browser and enters
http://siteroot/cms400developer/developer/PageBuilder/PageLayout.aspx, he is redirected tohttp://sitroot/cms400developer/developer/PageBuilder/PageLayout.aspx?pageid=1035
Assigning a Default Taxonomy Category to a Wireframe
While creating a new PageBuilder page in the Ektron Workarea, the user can assign one or more of the taxonomy categories that are set in the page’s folder properties. See example below.
As a developer, you can assign a default taxonomy category to a wireframe. If you do, and the user creating a page using that wireframe makes no changes, the default category is assigned to the page. However, the user can change the taxonomy when the Add New Page screen appears.
NOTE: Default taxonomies are applied only when a user logs into a Web site and adds a new page -- they are not applied when creating new pages within the Workarea.
To assign a default taxonomy category to a wireframe:
Prerequisite: The ID number and the name of the top-level parent taxonomy for the default taxonomy category. For example, the screen shows that the Products category ID is 190, and its parent taxonomy is OnTrek Site Navigation.
- In the Ektron Workarea, navigate to the folder properties screen of the folder to which the wireframe is applied.
- Click Edit Properties.
- Locate the Taxonomy tab of the Edit Folder properties screen.
- Check the box of the top-level taxonomy to the wireframe you want to assign.
- Check the box of the parent taxonomy of a taxonomy category that you want to assign; that is, a child node below a top-level taxonomy.
- Click Update to save your changes to folder properties.
- Open Visual Studio.
- Open the wireframe to which you will assign a default taxonomy.
- Find the PageBuilder menu user control (circled below).
- Add a new property,
SelTaxonomyID. - For the property’s value, enter the ID of the default taxonomy or category.
Here is an example of that control with the
SelTaxonomyIDproperty added.<ucPageBuilder:PageHost ID="ucCms400Developer"SelTaxonomyID=”13” runat="server" /> - Save your changes.
To continue the above example, the next time someone creates a page based on that wireframe, taxonomy ID 13 will be the page’s default taxonomy category. If desired, the user can change it by navigating to the Taxonomy tab and assigning different or additional categories.
![]()