Using Webtrends Analytics
Marketers today face a whole new set of challenges. With the explosion of new digital channels such as social and mobile, it is even harder to understand customer behaviors and optimize how to communicate with them. Both Webtrends Analytics On Demand and On Premises deliver the industry’s most accurate picture of how customers interact with your brand in the digital space.
Real-time data, intelligent alerts, and the ability to easily share information within your organization means you empower your team to make smart and timely decisions based on solid data. You'll find new opportunities, ensure conversions are on track and, respond to needs faster than ever before.
Prerequisite: Webtrends Analytics: On Premises (versions 9 and above) or On Demand
Setting up Webtrends Analytics
To set up Webtrends Analytics to work with Ektron, follow these steps.
Part One: Create Webtrends Account and Create Tracking Script
Part Two: Build the Tracking Files
Part Three: Copy Webtrends Tracking Files to Ektron
Part Four: Update Ektron's web.config File
Part One: Create Webtrends Account and Create Tracking Script
In this step, you set up a Webtrends account and set up one or more data sources.
1. Set up an account with Webtrends (http://www.Webtrends.com/Products/Analytics).
2. Webtrends sends you an account name, username, and password.
3. Log into Webtrends using this URL: https://ondemand.Webtrends.com/login.asp .
Use the account name, username, and password you obtained in Step 2.
4. From that page, follow this menu path: Administration (lower left corner) > Application Settings > Data Sources.
5. Click New (circled below).
 Show me
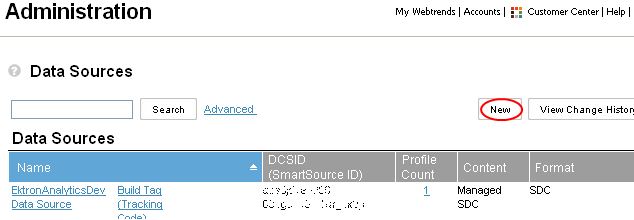
6. A Data
- Enter a name for the data you will retrieve.
- Select your server's time zone.
- Click Next.
- A summary of the information you entered appears along with a Webtrends data collection server ID (DCSID) value
- Click Save.
- The Data Sources screen reappears with your new data source.
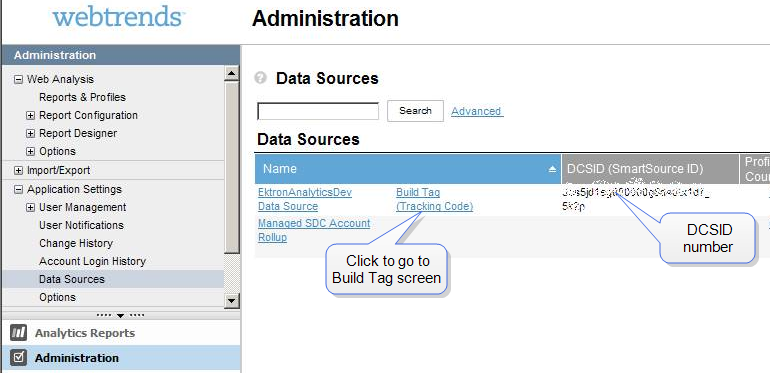
7. Copy your Data Source ID number (DCSID), indicated in the following figure. You will use this number in Part Two: Build the Tracking Files
Part Two: Build the Tracking Files
In this step, you tell Webtrends the type of data you want to track. Webtrends then generates files that track that data.
1. Open Webtrends' Tag Builder page: https://tagbuilder.Webtrends.com/?WT.mc_id=Dev_network_link.
NOTE: From the Data Sources screen, you can click Build Tag (Tracking Code), indicated in the above illustration.
2. Complete this page, which prompts you to define the data that Webtrends should track.
Into the page's Webtrends data collection server ID (DCSID): field, paste the number you copied in Step 7 above.
For help completing the Tag Builder page, click the information button in the top right corner.
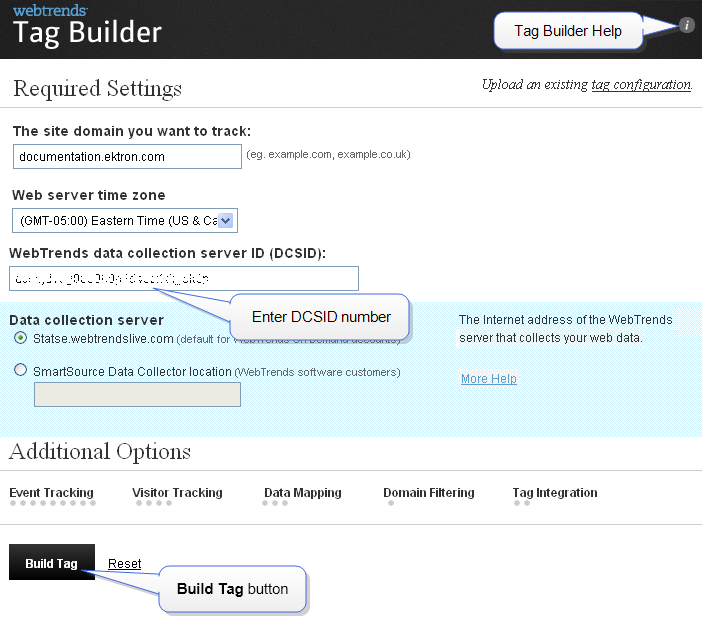
3. Click the Build Tag button (indicated in the figure above).
4. Webtrends generates files you will use to track usage statistics.
5. The Summary and Confirmation screen appears. Click the Download tag button.
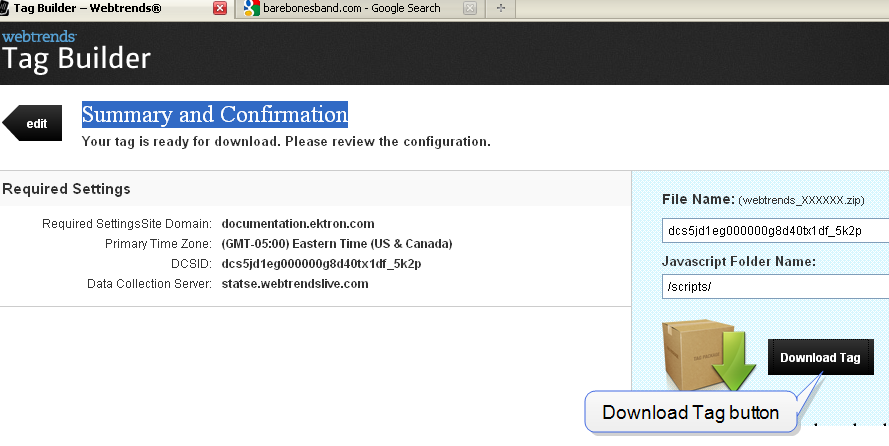
6. Save the .zip file to your computer.
Part Three: Copy Webtrends Tracking Files to Ektron
Prerequisite: Permission to edit files on your Ektron Web server
In Part Three, you
replace the Webtrends.html file in your Workarea folder with the one you downloaded in Part One: Create Webtrends Account and Create Tracking Script
replace the <div> tag in your Workarea's Webtrends.ascx file with the one in the downloaded file of the same name
1. Extract the .zip file you downloaded in Step 6 of Part Two: Build the Tracking Files .
2. Open the folder that contains the extracted files.
3. Copy Webtrends.js.
4. Paste it into the site root\Workarea\Analytics\template folder. This action replaces a file of the same name.
5. In the folder that contains the extracted files, open Webtrends.html.
6. Copy the <div> tag highlighted below.
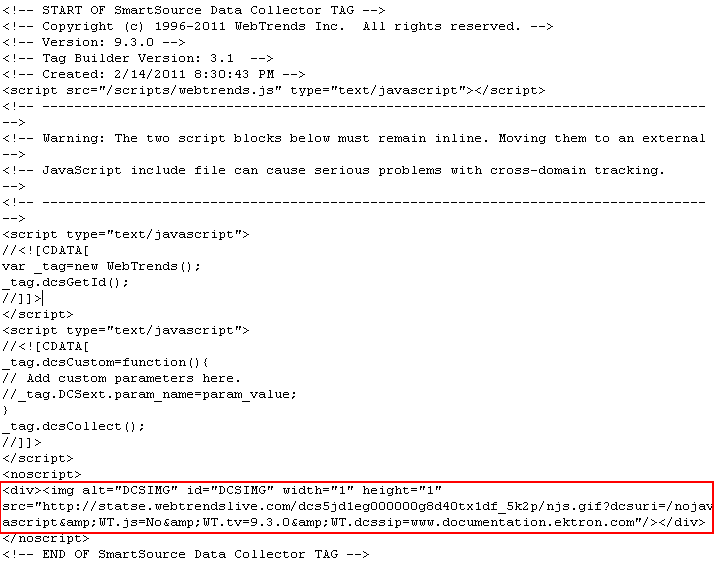
7. In the site root\Workarea\Analytics\template folder, open Webtrends.ascx.
8. Replace the <div> tag with the one you copied in Step 6.
Part Four: Update Ektron's web.config File
In Part Four, you update Ektron's web.config file with information it needs to connect to Webtrends.
Prerequisite: Permission to edit files on your Ektron Web server
1. Obtain a value for your web.config file's ProfileFileName property. To do this
- go to https://ws.Webtrends.com/v2/ReportService/profiles/?format=xml
- you are prompted for a username and password.
In the User name field, enter your account name\username that you obtained in Step 2 of Part One: Create Webtrends Account and Create Tracking Script.
In the Password field, enter your password.
A screen displays your Webtrends profile, like this.
  <?xml version="1.0" encoding="utf-8" ?>
        - <list>
        - <ProfileDefinition>
       <string name="ID">ABCD1234</string>
        <string name="name">MyAnalyticsAccountName</string>
        <decimal name="AccountID">234567</decimal>
        <decimal name="TimeZoneID">-500</decimal>
        </ProfileDefinition>
        </list>
You will use the string name value (highlighted in red) in Step 4, ProfileFileName property.
2. Open your site root/web.config file
3. Find the tag beginning with <add name="Webtrends".
4. Replace the Webtrends tag's properties as shown below.
| Property | Description |
|---|---|
|
Name |
The name displayed on the report. If you have several accounts, you can use names like these. Webtrends – dev.ektron.com Webtrends – document.ektron.com However,the value of this field for one analytics provider must match the value of the <AnalyticsDataProvider defaultProvider> tag. |
| Type | Do not change. |
| Username, Password |
1. Go to C:\Program Files\Ektron\CMS400v8x\Utilities 2. Encrypt the Webtrends username and password you obtained in Part One: Create Webtrends Account and Create Tracking Script 3. Enter the encrypted values into these properties. |
| ProfileFileName | Enter the string name value you obtained in Step 1. |
| SiteURL | Enter the URL visitors use to access your site. For example, www.example.com. |
| UserAccount |
Enter the account name you obtained in Part One: Create Webtrends Account and Create Tracking Script |
| Endpoint |
The default value is https://ws.Webtrends.com/v2/ReportService/. You only need to update this value if you are not using the default Data Collection Server on the Tag Builder page.See Also: Part One: Create Webtrends Account and Create Tracking Script |
|
Cache |
You can use this field to cache the Analytics provider's data. Enter a number in seconds. The maximum 86400. Caching improves the performance of the traffic report page. |
| AnalyticsTrackingCodePath | Do not change. |
To learn about viewing Webtrends data within Ektron, see Webtrends Site Reports.