![]()
Working with Menus in a Multi-Language System
Note: For background information about supporting multiple languages on your Web site, see Working with Menus in a Multi-Language System.
You can create an edition of any menu in every supported language. When a site visitor selects a language, navigates to a page that has a menu and clicks the menu link, Ektron CMS400.NET displays the menu in the selected language if it is available. If a menu in that language is not available, nothing appears.
Before creating or translating a menu, it’s a good idea to create or translate all content that will be on the menu. In this way, you can link this content to the new menu. However, after creating a menu, you can add new items to it.
See Also: Working with Menus
Translating a Menu
To translate a menu into any supported language, follow these steps. You can navigate to the menu via the Web site or from the Workarea. Each procedure is described below.
By Navigating the Site
1. Sign on to Ektron CMS400.NET
2. Select the menu’s current language.
3. Navigate to the page that has the menu you want to translate.
4. Click the menu and the Edit Menu option.
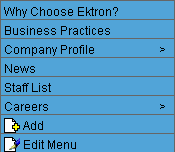
5. The View Menu screen appears for the selected menu.
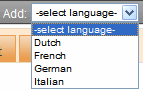
6. From the Add drop-down list, select the language into which you want to translate the menu.
7. The Add Menu screen appears. Complete the screen for the menu in the selected language. See Fields on the Add/Edit Menu Screen.
8. Click Save ( ).
).
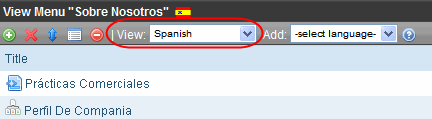
9. The View Menu screen reappears. Now, the View In drop-down list displays the menu’s new language.
10. Add items to the menu. See Adding a Menu Item. If adding content, you can only insert an item in the selected language.
11. Later, you can add more menu items, edit them, delete them, view them, etc.
These capabilities are described in this chapter.
By Accessing the Menus Report Screen
1. From the Workarea screen, click Content > Menus.
2. Click the menu you want to translate.
3. The View Menu screen appears for the selected menu.
4. From the Add drop-down list, select the language into which you want to translate the menu.
5. The Add Menu screen appears. Complete the screen for the menu in the selected language. See Fields on the Add/Edit Menu Screen.
6. Click Save ().
7. The View Menu screen reappears. Now, the View In drop-down list displays the menu’s new language.
8. Add items to the menu. See Adding a Menu Item. If adding content, you can only insert an item in the selected language.
Later, you can add more menu items, edit them, delete them, view them, etc.
Creating a Menu in Any Language
To create a menu in any language, follow these steps.
1. Form the Workarea screen, click Content > Menus.
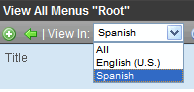
2. From the language drop-down list, select the new menu’s language.
3. Create the menu. See Adding a Menu via the Menus Tab.


![]()