Creating Business Rules for Your Web Site
Prerequisite: Only members of the Administrators user group and those defined in the Manage Members for Role: Add Role Member Business Rule Editor screen can work with Business Rules. See Also: Defining Roles
Business Rules let you define conditions for Web pages on your site. You choose an action based on whether the conditions are true or false when a site visitor browses your site. For example:
- Condition—a site visitor visits your site for the first time
- Action—add a cookie to the site visitor’s computer and display a welcome message
With Business Rules, you do not write code to set conditions and initiate actions. You simply complete the Business Rules wizard, have your developer add a Business Rules server control to your Web form, and assign a Business Ruleset to the server control. See Also: BusinessRules Server Control
Business Rules start out with a ruleset made up of one or more rules. Rules consist of conditions and actions. There are several predefined conditions and actions for rules.
Conditions include:
- Cookie Parameter = value
- Form Parameter = value
- QueryString Parameter = value
- Server Variable = value
- Custom Parameter = value
Actions include:
- Display a calendar
- Display a message
- Open a URL in a new window
- Pop up a message
- Redirect to a new URL
- Set a cookie value
- Display content
When a rule is defined, you can add it to multiple rulesets. This is useful if several rulesets use a common rule.
Selecting a Rule
There are 2 ways to select an existing rule:
- Check boxes—allow you turn a rule on or off by clicking the check box. Checked, the rule is active; unchecked, the rule is inactive.

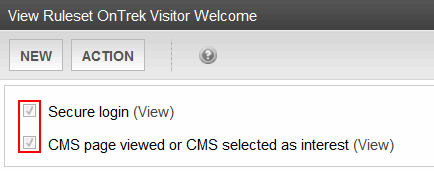
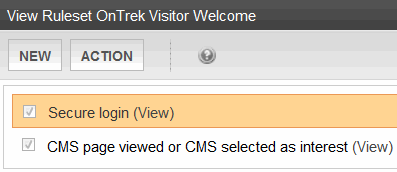
- Highlighting—used when you want to work with a rule; for example, you want to edit or delete a rule. To highlight a rule, click its title.
Creating a New Business Ruleset
To add a new ruleset:
- Navigate to Settings > Business Rules.
- Click Add New Ruleset. The Add New Ruleset screen appears.
- In the Name text box, add a unique, descriptive name for the ruleset.
- Click Save Ruleset. The View Ruleset screen appears.
You can now add a rule (as described in Add a New Rule to a Ruleset ) or click Back ( ) and return to add a rule later.
Working with Rulesets
After creating a ruleset, you typically add rules to it via the View Ruleset screen. This screen is the launch pad for working with existing rulesets or creating new rulesets.
Edit a Ruleset
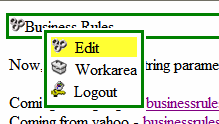
You can edit a ruleset from 2 locations: the Web page or the Workarea. To edit a ruleset from the Web page, navigate to a Business Rule on a Web page while logged in. Then, right click the Business Rule icon and click Edit.
To edit from the Workarea:
- Navigate to Settings > Business Rules. The Business Ruleset screen appears.
- Click the ruleset name.
- Click Action > Edit Ruleset. The Edit Ruleset screen appears.
- From this screen, you can make a rule inactive (Selecting a Rule), remove a rule from the ruleset (Remove a Rule From a Ruleset), or change the order in which rules are applied (Change the Order of Rules in the Ruleset).
Remove a Rule From a Ruleset
To remove a rule from a ruleset:
- Navigate to the Edit Ruleset screen, as explained in Edit a Ruleset.
- Highlight the rule you want to remove.
WARNING! The rule must be inactive (check box deselected) for you to remove the rule. If the check box is not empty, the rule will only appear as though it has been removed.
- Click Remove Rule (
 ). A window indicates that the rule will be removed from this ruleset only.
 - Click OK. The rule is removed from the Edit Ruleset screen.
- Click Save Ruleset.
Change the Order of Rules in the Ruleset
The order of rules in a Ruleset affects their application when a site visitor views a page. For example, you want to display a welcome message before a content item. To accomplish this, move the rule for the welcome message above the rule for a content item.
- Navigate to the Edit Ruleset screen, as explained in Edit a Ruleset.
- Highlight the rule you want to reorder.
- Click the up and down arrow buttons to move the rule within the list.
- Click Save Ruleset.
Delete a Ruleset
When you delete a Ruleset, it is removed from the system permanently. However, rules in a Ruleset are not deleted because they can be used in multiple Rulesets.
- Navigate to Settings > Business Rules. The Business Rulesets screen appears.
- Click the ruleset name.
- Click Action > Delete Ruleset. A dialog asks you to confirm the deletion.
- Click OK.
Add a New Rule to a Ruleset
To add a new rule:
- Navigate to Settings > Business Rules. The Business Rulesets screen appears.
- Click the Business Ruleset for which you want to create a new rule.
- Click New > Add New. The Rules Wizard launches and helps you define a rule.
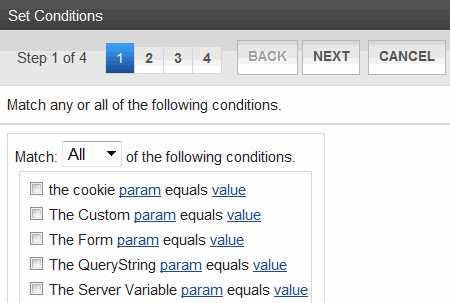
- Wizard Step 1 prompts you to create conditions for the rule and decide whether a site visitor needs to match Any or All conditions. Click the param and value links to open a dialog to enter information.
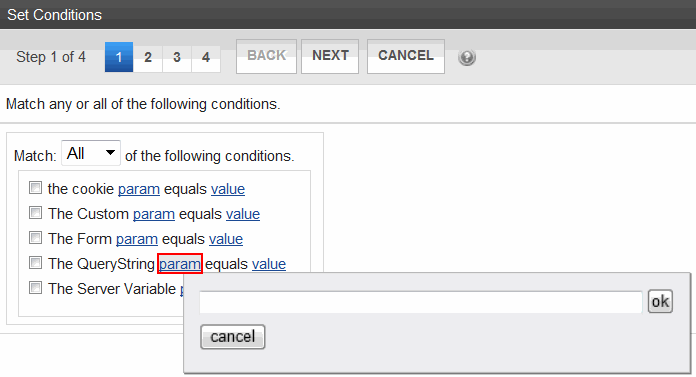
- Place a check next to any condition you want to use. Use the following table to help you complete the param and value fields.

Condition
Description
Example
The Cookie param equals value
Use a cookie for this condition.
- param—enter Name in this field.
- value—enter the name of the cookie in this field.
Does the site visitor's system have an Ektron cookie?
Usage:
The Cookie param “Name” equals value “Ektron”
The Form param equals value
Use a form elements field name and match the value entered into the element.
- param—enter a form’s element Field Name from a form.
- value—enter the value you want the form element to match.
A form has a Choices Field element with the Field Name “Favorite_Food” and choices of Pizza, Steak and Chicken. When a site visitor chooses Pizza and clicks submit, your rule launches a Pizza company’s Web site.
Usage:
The Form param “Favorite_Food” equals value “Pizza”
The QueryString param equals value
Use the QueryString for this condition
- param—the name of the QueryString. For example, ID.
- value—the value associated with the parameter. For example, 18.
Is content with the ID of 18 being displayed?
Usage:
The QueryString param “ID” equals value “18”
The Server Variable param equals value
Use server variables from the site visitor.
- param—enter the name of a server variable. For example, HTTPS.
- value—the value associated with the parameter. For example, On.
Is the site visitor’s browser using SSL?
Usage:
The Server Variable param “HTTPS” equals value “On”
A list of server variables and their descriptions can be found at http://msdn.microsoft.com/library/default.asp?url=/library/en-us/iissdk/html/21b3be8f-d4ed-4059-8e21-6cba2c253006.asp.
The Custom param equals value
Use custom parameters from the user. User parameters are defined in the code-behind of a Web page.
- param—enter the name of a custom parameter. For example, AcctBlnc
- value—the value associated with the parameter. For example, 1000
Is the user's account balance $1000?
Usage:
The Custom param “AcctBlnc” equals value “1000”
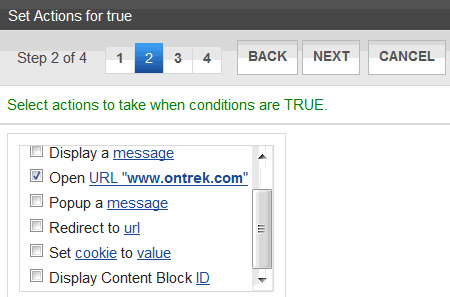
- Click Next. Wizard Step 2 prompts you select an action to take if conditions are true. Check the boxes for the actions to take. Click the blue links to add the appropriate information.
- Display Calendar ID—Enter an Ektron Calendar ID.
- Display a Message—Enter a message to be displayed.
- Open URL—Enter a URL. This opens a new window with the URL.
- Popup A Message—Enter a message that appears in a popup dialog box.
- Redirect to a URL—Enter a URL to redirect a the site visitor’s browser.
- Set Cookie to Value—Creates a cookie on the site visitor’s system. Enter Name for Cookie and the name of the cookie for Value.
- Display Content Block ID—Enter an Ektron content block’s ID.
- Click Next. Wizard Step 3 lets you select actions to take when conditions are false. This works the same as Wizard Step 2.
- Click Next. Step 4 of the Wizard asks you to enter a name for the rule in the text box.
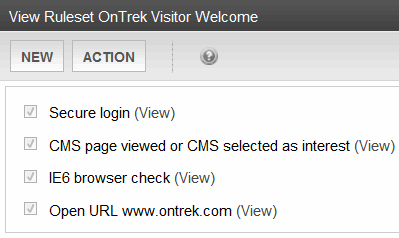
- Click Done. The View Ruleset screen appears. Your rule appears in the Ruleset box.
Add an Existing Rule to a Ruleset
You can add a rule to multiple Rulesets. To do so:
- Navigate to Settings > Business Rules. The Business Rulesets screen appears.
- Click a Business Ruleset to which you want to add a rule.
- Choose New > Add Existing. The Add an Existing Ruleset screen appears.
- Check one or more rules to add to the Ruleset.
- Click Save Ruleset.
Edit a Rule in a Ruleset
- Navigate to Settings > Business Rules. The Business Rulesets screen appears.
- Click on the Ruleset that contains the rule to be changed. The View Ruleset screen appears.
- Click on the name of the rule to be changed. The rule is highlighted.
- Choose Action > Edit Rule. The Rules Wizard appears with the rule loaded.
- Edit as necessary. The Rules Wizard is explained in Add a New Rule to a Ruleset .
BusinessRules Server Control
The BusinessRules server control lets you add a Business Rule created in the Workarea to a Web form. It also lets you add a place holder for a Business Rule. Then, an Ektron administrator can create a business rule at a later date.
The following are Ektron-specific server control properties. You can find information about native .NET properties such as font, height, width and border style in Visual Studio® help.
- Authenticated (String)
Indicates if you are logged into the CMS Explorer and can use it to browse to content, collections, and so on. See Also: Browsing Your Ektron Site Using CMS Explorer.
- DoInitFill (Boolean)
By default, Fill occurs during the Page_Init event. Set to false if you want to postpone the fill-action until later. In this case, Fill is automatically called during the Page Render event. You might do this if you need to set or change a property on the control in code-behind and have it render with your changes shown.
- Hide (Boolean)
Hides or displays the output of the control in design time and run time.
- True—Hide the control output.
- False—Display the control output.
- Language (Integer)
Set a language for viewing content; shows results in design-time (in Visual Studio) and at run-time (in a browser).
- RuleID (Long)
The ID of the Ruleset to evaluate. If you don’t know the ID number of the Ruleset, use the CMS Explorer to browse to it. See Also: Browsing Your Ektron Site Using CMS Explorer
- SuppressWrapperTags (Boolean)
Suppresses the output of the span/div tags around the control.
- True—Suppress wrap tags.
- False (default)—Allow wrap tags.
- WrapTag (String)
Lets a developer specify a server control’s tag.
- Span (default)—designate an inline portion of an HTML document as a span element.
- Div—apply attributes to a block of code.
- Custom—Lets you use a custom tag.
![]()