Creating an Email Content Recommendations campaign
Email Content Recommendations is part of the Optimizely Digital Experience Platform. It requires a specific installation and license. The Optimizely Digital Experience Platform contains many features to support you in your daily work. Depending on how your solution is set up, some features described in this documentation may not be available to you. Contact your system administrator to find out more. See Optimizely World for technical information.
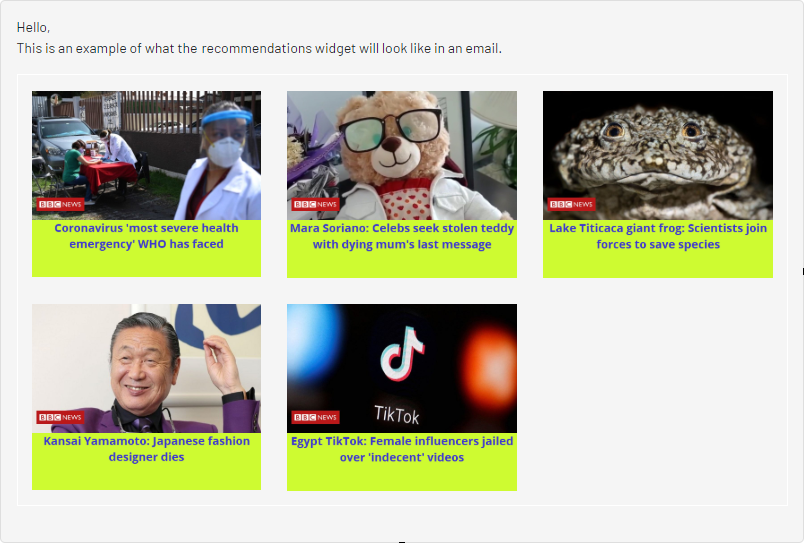
Email Content Recommendations lets you deliver relevant content to customers by email.
To create a new Email Content Recommendations campaign:
- Select Configuration > Email Content Recommendations.
- Click Create a new campaign.
- Configure your campaign.

- Campaign. Enter a name for your Email Content Recommendations campaign.
- Image. Modify the dimensions (number of pixels) and background color (hexadecimal values) of the content information image. Opacity (0-255) modifies the background color so that you can have an opaque-to-transparent background.
The size of the actual product image will not change because that image is delivered with the same size as it is provided from your system to Optimizely in the product catalog feed.
- Title. Modify the font attributes and alignment of the content title.
- Preview > Content title. Add a title to each content item, which shows in the preview.
- Click Save Campaign. Your new campaign appears in the list, where you can edit, delete, and copy the sets.

- In the Configuration step, specify how many content recommendations you want to appear.
You must have a valid API key to send recommendations. If no recommendations match a recipient's profile information to provide relevant content, you can send a fallback email that contains latest content, ordered by descending published date.

- In the HTML and preview step, you can generate the HTML code that is added to your email template, and preview the output of the Email Content Recommendations widget.
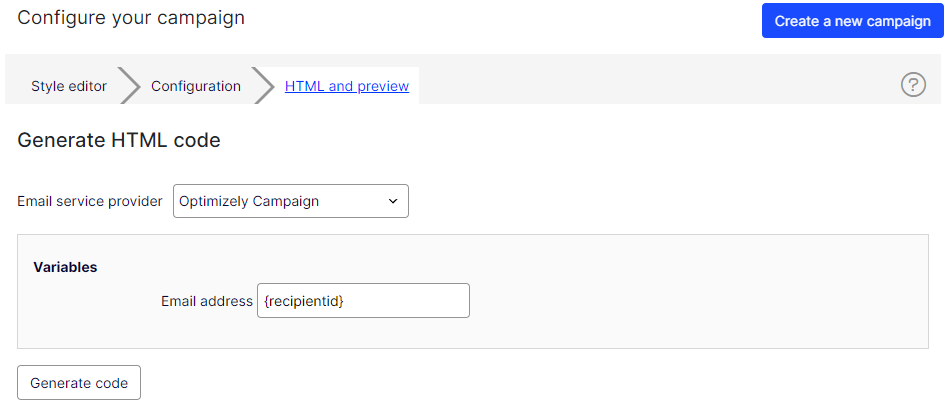
- Select your ESP from the Email service provider drop-down list. A Variables section appears.
If you do not see your ESP, you can manually insert your ESP email variable in the Email address variable field. This information is available from your ESP, so contact your ESP account manager or support team, if you are unsure what the correct variable is.
The Email address variable is required to let Optimizely identify the user by their email to serve personalized recommendations that are specific to the user. Upon sending an email, your ESP populates the variable in the link with the recipient's email address. If the variable is not present or is incorrect, Optimizely is not informed of the user's email address, and therefore cannot personalize the recommendations.
- Click Generate code.The generated HTML code appears.

- Copy and paste the HTML code into your email template to retrieve recommendations.
The generated HTML code is annotated to clearly show the links for each content recommendation. The code does not include any other formatting. You can add HTML and CSS in your template to style the recommendations, such as adding them to a table.
- Select your ESP from the Email service provider drop-down list. A Variables section appears.
Previewing your campaign
To preview the output of the configuration you have set up, click Preview email.
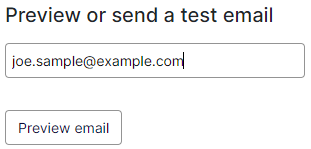
When you preview the recommendations in Personalization Portal, a sample output appears for the email address you entered. You can try out different email addresses to see how the recommendations may look for different users.