 Optimizely Social Reach
The Optimizely Digital Experience Platform contains many features to support you in your daily work. Depending on how your solution is set up, some features described in this documentation may not be available to you. Contact your system administrator to find out more. See Optimizely World for technical information.
Optimizely Social Reach lets marketers use social media to drive traffic and increase conversion rates by sending social messages that promote website content. After the installation of the add-on, it shows up in the top menu as a gadget in edit view.
Due to changes in the APIs of Facebook and LinkedIn, Optimizely Social Reach is available only for use with Twitter.
When a message is sent, Social Reach tracks actions such as the number of clicked links, re-tweets, comments, and likes. Social Reach supports Google Analytics to monitor statistics for conversions or segments.
When you set up social channels, the Administrators, WebAdmins and WebEditors groups have read and post access rights. To customize access rights, use the SocialAdmins group for administering channels, and use the SocialEditors group for reading and sending messages.
Message overview
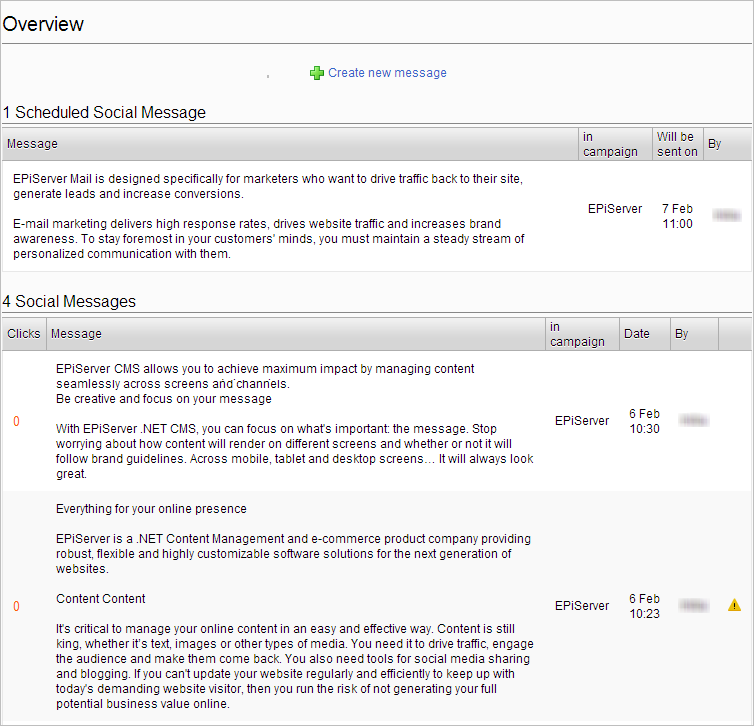
The Overview option in the top menu displays a summary of sent messages with number of clicks statistics. The information is updated every 10 seconds. Click a message to see details.

You can only get click statistics for links to websites with Optimizely Social Reach installed.
Creating and sending messages
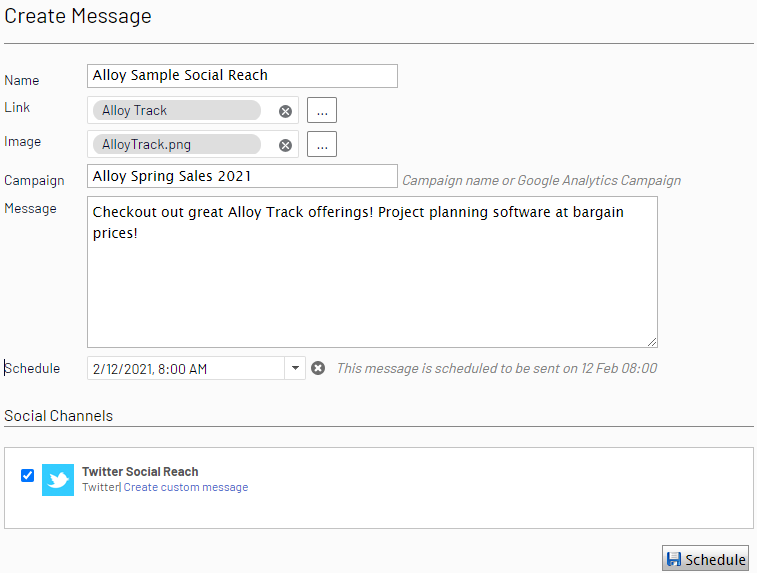
You can create a default message for defined channels, or create customized messages for specific channels from the Outreach or Overview options in the top menu.

- Name. Required. Give the message a title.
- Link. Optional. Add a link to a page, an image or a document on your website, or an external website.
- Image. Optional. Select an image to include in the message.
- Campaign. Optional. Add a campaign name. You can use this field for tracking if you are using Google Analytics, or for monitoring top campaigns if you are using Google Analytics for Optimizely.
- Message. Add default message text. For Twitter messages, the number of characters is limited. You are notified if the number is exceeded. The link and image (if provided) are attached at the end of the message.
- Social Channels. Select Twitter (Facebook and LinkedIn are no longer supported). If you do not want to use the default message, click Create custom message to define a specific message.
- Send Now, or Schedule to send the message later.
The scheduled publishing of messages is managed by the Social Reach Publish Messages scheduled job, which regularly checks for messages to be sent to social channels. Search robots that scan postings may cause click statistics to rise immediately after posting a message.
Quick message access
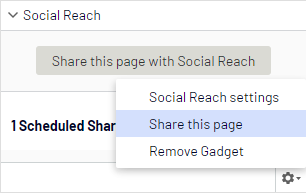
The Social Reach gadget lets you create a message while editing a page. The gadget also displays information about previous messages for that page.
Click Share this page with Social Reach (or select it from the gadget menu), and the Outreach view opens with the link to the page ready.

Managing social channels
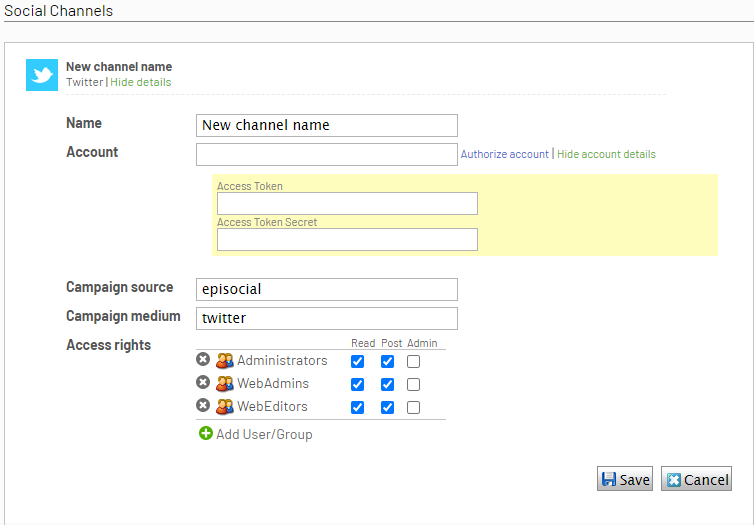
You can add, edit, and delete social channels for your website under the Settings option in the top menu.
Adding a channel
- Ensure that you have a working account for the social media channel you want to define.
- Select Twitter in the Type field and click Add Channel. Facebook and LinkedIn are no longer supported.

- Click Authorize account to log into the channel and retrieve the account details. (Click Show account details to display them.)
- Define access rights for your editor groups to read, post and administer channel messages (optional).
If you want to use Google Analytics to segment and track referrals from different channels, use the Campaign source and Campaign medium fields. By default, the source is set to episocial, and the medium to the channel name.
Editing and deleting a channel
Click See details for a channel, and then Edit to change the settings, or Delete to remove it.
Failing messages
A warning symbol in the Overview listing indicates a failed message. Click the symbol for more details.
Failures often are caused by channel configuration errors. If an account has expired, a message cannot be sent. Reported comments or likes suddenly drop to 0 for a posted message.
Go to Settings and re-authenticate the channel account. If channel services are not operating, you cannot send messages until the services are operating.
Click Resend to send the message, or Remove to delete the message for that channel.