Managing users
Creating a user
Before you can assign a user to a user group, you must add the user to the system.
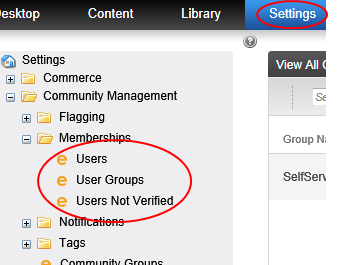
- Go to Workarea > Settings > Users to display the View Users screen.
- Click Add User. The Add a New User to the System screen appears.
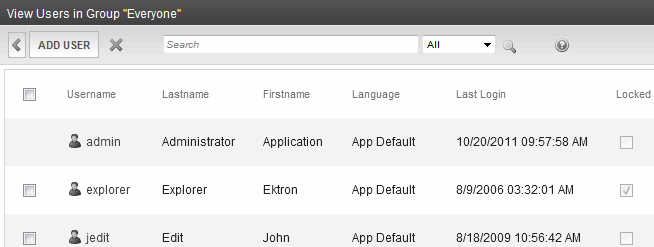
NOTE: To learn about the lock and unlock buttons (
 ), see Account Locked. The buttons provide a shortcut to that field for users with a check in the box to the left of their name.
 - Enter the following information about the user. A red asterisk (*) next to a field name indicates that the field is required and cannot be blank.
 General Tab (tabs only appear when editing)
 —Editable by a non-administrator user. Non-admin users can edit their own profiles only, and only fields indicated.
- Username. Insert a username for the user you want to create.
- Path. This field is only available when using LDAP Authentication. See also: Adding user information from an LDAP server to Ektron.
- First Name. Enter the first name of the user.
- Last Name. Enter the last name of the user.
- Display Name. Enter the name that is used to identify a user in the Workarea and on the website. This can be different from the Username, which is the name used to log in.
NOTE: The Display Name cannot be blank.
- Password. Enter a password for the user.
See also: Ektron's password security policy.
- Confirm Pwd. Confirm the password by typing it again.
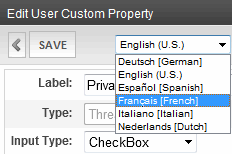
- User Language. Select the language in which the user will view Ektron screens and messages. The language also determines the default value whenever a drop-down list of languages appears within Ektron.
The drop-down list is derived from the Language Settings screen, available from the Settings > Configuration folder.
Do not confuse the system language with the user’s ability to create and edit foreign editions of content. This field does not prevent a user from working with multiple language content.
See also: Working with multi-language content.
NOTE: If the selected language is not English, French or German, it is only supported after you download the Ektron Language Support Program from Ektron and translate the website.
- E-Mail Address. Enter the email address of the user. Notification email is sent to this address unless the
NOTE: If the Enable Sending of System Notification Email box on the Application Setup screen is checked, and the Check to prevent workflow and task emails being sent to this user box on this screen is not checked, you must supply an email address.
- Account Locked. Available in edit mode: Check this box to lock or unlock this user. Locked users cannot log in. For information on events that automatically lock a user out, see Restricting login attempts. You can manually lock or unlock users via the lock buttons () on the View Users in Groups screen.
- Content and Forum Editor. the default editor appears, and you cannot change it, unless your Ektron administrator set the siteroot/web.config file's
ek_EditControlWin(for Windows computers) orek_EditControlMac(for Macintosh computers) property toUserPreferred, in which case you may choose an editor. - Avatar. An image or icon to represent you in the Forum.
Insert a Web path to the image. For example:
http://www.example.com/smileyface.gif. Alternatively, you can click Upload to browse to a file on your network. - Address. Enter the address used to find this user’s location when a search based on location is being performed. You can enter either a full address or a postal code.
- Latitude, Longitude. The Google GeoCoder strategy uses the information from the Address field to determine the user's latitude and longitude. These values are used to identify a user’s location when someone performs a search based on location.
Custom Properties tab- Check to prevent workflow and task emails being sent to this user. Check this box to disable workflow and task email notifications for this user. If you do, the user does not receive the notifications described in . However, this field has no effect on the user’s ability to receive instant email.
NOTE: The field appears only if the Enable Sending of System Notification Email box on the Application Setup screen is checked.
- Features. Lets the profile owner edit events on a Web calendar. When this is checked, it cannot be unchecked. See also: Working with calendars
- Private Profile. Choose from one of the following options to determine which other users can see the owner's community activities:
- Public. The user information is accessible by others on the eIntranet.
- Private. The user information is not accessible by others on the eIntranet.
- Colleagues. The user information is accessible only by people on the eIntranet that are connected as colleagues.
NOTE: Using the ActivityStream Widget on a PageBuilder Pageexplains how this setting affects other users' ability to see your activities.
- Time Zone. Used by the Web Calendar feature, appointment times will show in the selected time zone.
- Phone. Must consist of a 10 digits (String) in this pattern: nnn-nnn-nnnn.
- Moderate. Check to make this user a moderator of a message board to approve and delete posts. Regular users in a group message board can create and delete only their own posts.
- Click Save. The View Users in Group Everyone screen appears with the new user included in the table. When you add a new user, he is automatically placed in the Everyone user group. To assign users to other groups, see Assigning a user to a user group.
- Continue this process until you add all website users, or reach the maximum allowed by your license.
NOTE: Contact Ektron Sales for pricing of adding more users to your license.
Editing a user
NOTE: If you are using Active Directory to edit a user, see Adding and maintaining user information.
- Go to Workarea > Settings > Users to display the View Users screen.
- Click the Username of the user you want to edit. The View User Information screen appears.
- Click Edit. The Edit User screen appears. The following lists describe the field descriptions.General Tab (tabs only appear when editing)—Editable by a non-administrator user. Non-admin users can edit their own profiles only, and only fields indicated.
- Username. Insert a username for the user you want to create.
- Path. This field is only available when using LDAP Authentication. See also: Adding user information from an LDAP server to Ektron.
- First Name. Enter the first name of the user.
- Last Name. Enter the last name of the user.
- Display Name. Enter the name that is used to identify a user in the Workarea and on the website. This can be different from the Username, which is the name used to log in.
NOTE: The Display Name cannot be blank.
- Password. Enter a password for the user. See also: Ektron's password security policy.
- Confirm Pwd. Confirm the password by typing it again.
- User Language. Select the language in which the user will view Ektron screens and messages. The language also determines the default value whenever a drop-down list of languages appears within Ektron.
The drop-down list is derived from the Language Settings screen, available from the Settings > Configuration folder.
Do not confuse the system language with the user’s ability to create and edit foreign editions of content. This field does not prevent a user from working with multiple language content.
See also: Working with multi-language content
NOTE: If the selected language is not English, French or German, it is only supported after you download the Ektron Language Support Program from Ektron and translate the website.
- E-Mail Address. Enter the email address of the user. Notification email is sent to this address unless the
NOTE: If the Enable Sending of System Notification Email box on the Application Setup screen is checked, and the Check to prevent workflow and task emails being sent to this user box on this screen is not checked, you must supply an email address.
- Account Locked. Available in edit mode: Check this box to lock or unlock this user. Locked users cannot log in. For information on events that automatically lock a user out, see Restricting login attempts. You can manually lock or unlock users via the lock buttons () on the View Users in Groups screen.
- Content and Forum Editor. The default editor appears, and you cannot change it, unless your Ektron administrator set the siteroot/web.config file's
ek_EditControlWin(for Windows computers) orek_EditControlMac(for Macintosh computers) property toUserPreferred, in which case you may choose an editor. - Avatar. An image or icon to represent you in the Forum.
Insert a Web path to the image. For example:
http://www.example.com/smileyface.gif. Alternatively, you can click Upload to browse to a file on your network.Avatar maximum sizeBy default, an avatar's maximum size is 200 kilobytes, and its height and width are reduced 125 pixels, preserving the aspect ratio.
- Check to prevent workflow and task emails being sent to this user. Check this box to disable workflow and task email notifications for this user. If you do, the user does not receive the notifications described in Automatic email Notification. However, this field has no effect on the user’s ability to receive instant email.
NOTE: The field appears only if the Enable Sending of System Notification Email box on the Application Setup screen is checked.
- Address. Enter the address used to find this user’s location when a search based on location is being performed. You can enter either a full address or a postal code.
- Latitude, Longitude. The Google GeoCoder strategy uses the information from the Address field to determine the user's latitude and longitude. These values are used to identify a user’s location when someone performs a search based on location.
- Forum Signature. Enter what you want to appear at the bottom of each forum post. You do not see the signature in the editor but it is added after you click Post.
- Tags. Click Add Tag and enter 1 or more tags that describe the profile owner. Tag keywords allow for tag-based searching. For example, you can add the tag electronics so that people can search for the profile owner who may be an electronics expert. See also: Tagging content, library items, users, and groups with keywords.
Workarea tab- Full Screen. When a check mark appears in this check box, the Workarea opens up to the size of the full screen. In addition, the Width and Height options are hidden. See Workarea tabs.
- Landing Page after login. See Modifying setup information.
- Set smart desktop as the start location in the Workarea. If you want the Smart Desktop to appear as soon as this user enters the Workarea, click this check box. See also: Managing content from the Smart Desktop. If you leave this check box blank, when this user enters the Workarea, he goes to the folder of the content specified at the Landing Page after login field.
- Restore Default Preferences. Restore the default Workarea settings specified by the Administrator.
Custom tab- Features. Lets the profile owner edit events on a Web calendar. When this is checked, it cannot be unchecked. See also: Working with calendars
- Private Profile. Determines which other users can see the owner's community activities. For example, Using the ActivityStream Widget on a PageBuilder Pageexplains how this setting affects other users' ability to see your activities.
- Time Zone. Used by the Web Calendar feature, appointment times will show in the selected time zone.
- Phone. Must consist of a 10 digits (String) in this pattern: nnn-nnn-nnnn.
- Moderate. Check to make this user a moderator of a message board to approve and delete posts. Regular users in a group message board can create and delete only their own posts.
Activities tabNOTE: If you disable Notifications, the Activities tab (which lets the user pick Notifications to receive and send) disappears.
- Colleagues. Select notifications you want to receive when a colleague performs an activity, and the agent that transmits the notification. For example, if you want to receive email notifications when a colleague posts a blog message, check inside the box for Blog Post in the email column. See also: Sending notifications to a community
- Community Groups. This tab sets preferences for all community groups. Select notifications you want to receive when a community group member performs an activity relating to the group, and the agent that transmits the notification. For example, you want to receive email notifications when a community group member posts to group’s blog. To enable this, check inside the Group Blog Post box in the email column. See also: Sending notifications to a community
For Developers: Ektron has created a UserGroupPreferences user control. If you add the control to a community group’s profile page, users can specify notification preferences for individual groups. This control is installed with Ektron and is located in siteroot\Workarea\Notifications\Controls. - My Activities. Select notifications you want publish when performing various activities on the website. For example, if you want to publish notifications when you post to your blog, check the box for Blog Post in the Publish column. See also: Sending notifications to a community.
- SMS. A checked box indicates that the type of content will be sent to your cell phone Short Message Service (SMS).
- Activity Stream. A checked box indicates that the type of content will be displayed in the Activity Stream widget on the eIntranet pages.
- Email. A checked box indicates that the type of content will be sent to your Email address, which is specified in the General tab of your profile.

Profile Links tabThis field displays the user's alias if community aliasing is set for users. See also: Types of URL aliasing.
- Make necessary changes to user information.
- Click Update.
Deleting a user
NOTE: If you are using Active Directory to delete a user, see Maintaining AD user information.
IMPORTANT: You cannot delete a user who is applied to any workflow. If you need to immediately disable a user, edit the user and check the Account Locked box. See also: Approving content for publication.
NOTE: Only certain users are allowed to delete Ektron users. See Auditing changes.
To delete a user from Ektron:
- Go to Workarea > Settings > Users to display the View Users screen.
- Click the Username of the user you want to delete. The View User Information screen appears.
- Click Delete (
 ).
). - Click OK.
WARNING! When a user is deleted, that action is permanent. The process cannot be undone.
Assigning a user to a user group
NOTE: If you are using Active Directory to assign a user to a user group, see Importing a user’s AD group information to Ektron.
When you create a user group, no user is initially assigned to it. To add a user to a user group:
- Go to Workarea > Settings > User Groups to display the View User Groups screen.
- Click the user group to which you want to add a user. The View Users in Group screen appears.
- Click Add User. Users who do not (yet) belong to the group appear.
- Select 1 or more users to add to the group using 1 or more of the following methods:
- To select specific users, check the box to the left of their name.
- To select all users, check the box in the column header row.
- Enter characters into the Search field and find only users that match them. For example, you could enter bill, click the Search button, and see only users with those characters in their name.
- Use the drop-down menu to sort the display by User Name, Last Name or First Name.
- Click Save.
- Click OK. The selected users are now members of the selected group.
- Continue this process until you add all users into User Groups.

Removing a user from a user group
NOTE: If you are using Active Directory to remove a user from a group, see Maintaining AD user group information.
Removing a user from a user group does not delete the user from Ektron. Also, you cannot remove users from the Everyone group.
- Go to Workarea > Settings > User Groups to display the View User Groups screen.
- Click the name of the group that includes the user you want to remove. Members of the group appear.
- Click Remove to the far right of the user that you want to remove.
- Click OK.
 ). The Edit User Group screen appears.
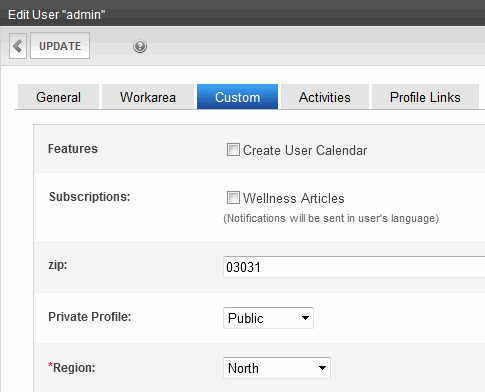
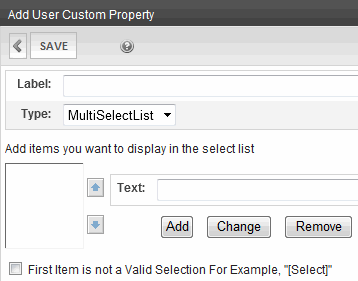
 Reorder. Change the order of the custom user properties on the Users or Membership User Properties screen. See
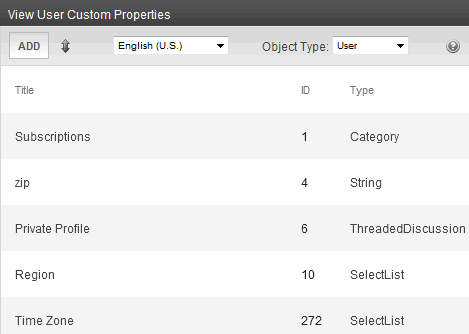
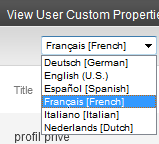
  Language Selection drop-down list —lets you view custom user properties by language. See
 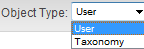 Object Type drop-down list—lets you choose users or taxonomies whose custom user properties you want to manage. See


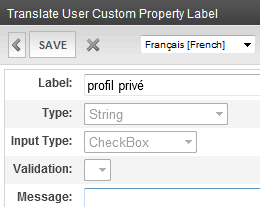
 ). A dialog box asks if you want to remove the translated custom property title.
 ).
).