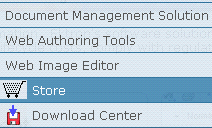
Ektron’s Menu feature lets users create and maintain a drop-down menu system for your website. The menu options can link to content, library files, external hyperlinks, and submenus. Below is a sample menu.
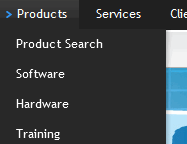
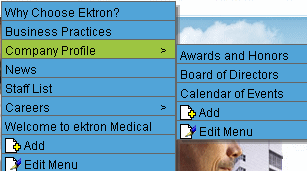
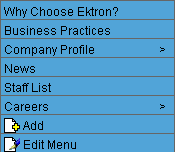
In this example (delivered with Ektron OnTrek sample site), the menu appears when a site visitor moves the cursor over Products on the home page. If a content contributor with permission to edit menus signs in to Ektron then views the menu, it has options for editing the menu and adding content.
NOTE: If you choose to hide the border that surrounds content when you are logged in, the Add and Edit options are also hidden. This lets you view the page as it appears when not logged in. If the page is set to show borders and you still do not see Add and Edit, the feature may be turned off. Ask your administrator or website Developer for more information.
Managing menus is a two-step process. The first sections in this chapter describe the first step: how Ektron users create and update menus. In the second step, a developer places a menu server control on a Web form. The control manages how the menu displays on your website.
The Structure of Menus and Menu Items
Accessing the Menus Feature
There are 3 ways to access the Menus feature:
- the Workarea, by choosing the menu's content folder then clicking View > Menu
- the Workarea, by choosing Content > Menus
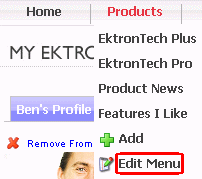
- the website's Edit Menu option, shown below


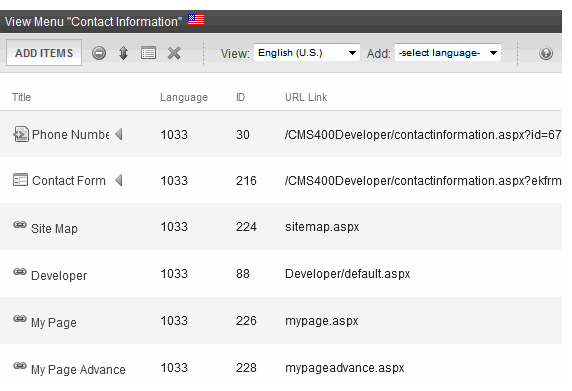
If you choose the first or second option, you select a specific menu. Then, it appears on the View Menu screen. For the third option, the selected menu appears on the View Menu screen.
From the View Menu screen, you can perform the following actions on a menu.
- Create a new menu
- Edit its information (for example, the URL and template link)
- Translate it
- Delete it
- Add or remove items
- Change the sequence of items
- Edit menu items
- For submenus
- add /remove items
- change sequence of items
- edit menu information
- edit menu items
Permission to Use Menus
To work with menus, a user must be one of the following.
- a member of the Administrators user group
- assigned the Collection and Menu Admin role See Also: Defining Roles
- assigned the Menu Admin role
Adding a Menu
You can create a menu by navigating to a folder or by choosing Content > Menus from the Workarea’s left frame. If you choose Content > Menus, it is automatically assigned to the root folder. In contrast, if you choose a content folder then create a menu, it is assigned to that folder.
Adding a Menu via Content Folder
- Navigate to a content folder.
- The current language appears as a flag next to the screen title. To create the menu in this language, proceed to the next step. To change the new menu's language, click View > Language and select the new language.
- Click New > Menu. The Add Menu screen appears.
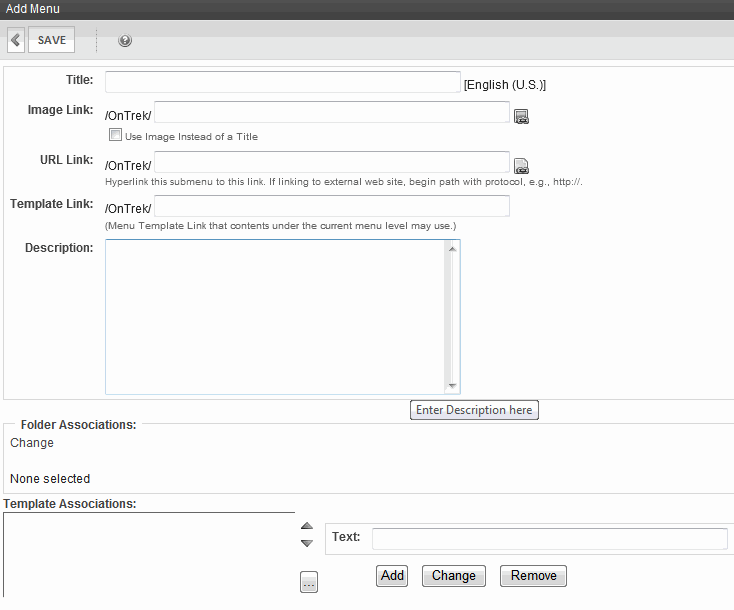
- Use the following information to complete the screen.—Fields—
Fields on the Add/Edit Menu Screen
Field
Description
Title
The name given to the menu by its creator. It appears on the Web page to indicate the kind of information on the menu.
Image Link
You can have an image appear next to or instead of the menu title. For example:
To do this:
Prerequisite
The image must reside in the library. If it does not, add it before proceeding. For more information, see Adding a File to the Library.
- Click the icon to the right of the ImageLink field (
 ).
). - The library window opens.
- Navigate to the folder that contains the image you want to use.
- Click Insert.
Using Image to Replace Title Text
Alternatively, you can replace menu text with an image, so that only the image appears on the menu. To do this, check the Use image instead of a title box.
After you create a menu, your developer links it to text or an image on a Web page by modifying a page template. When a site visitor moves the cursor over the text or image, the menu appears. In the example below, the menu appears when the site visitor moves the cursor over Products.
You can also assign a URL link to a menu using this field. If you do, and the user clicks the link text or image, he jumps to the specified page.
For example, in this field, you assign the product landing page,
siteroot/products.aspx. In the illustration above, if the user moves the cursor over Products, the assigned menu appears. However, if the user clicksProducts , he jumps tositeroot/products.aspx.Entering the Path to the Landing Page
The path may be
- relative to site root, such as
siteroot/jobs.aspx - a static template path or a dynamic path, such as
wellness.aspx?id=40&wellness=Hemophilia - an external hyperlink, such as
http://www.example.com.
NOTE: This field applies to content only. It has no effect on other types of menu items (such as images). Also, this field only affects content that dynamically references a content block, such as
/CMS400Min/therapies.aspx?id=84. If the menu option is a template that includes content (for example,/CMS400Min/news.aspx), the template identified here is ignored.If you want to apply a template to this menu, enter it here. If you do, content on this menu uses this template when selected from the menu.
If you do not, this menu's content uses the template specified in its Quicklink.
Description
Add a more detailed description for the menu.
Folder Associations
Template Associations
- Click the icon to the right of the ImageLink field (
- Click Save.
After creating the menu, you may assign items to it. See Adding a Menu Item .
Adding a Menu via the Menus Tab
If you choose a content folder then create a menu, it is assigned to that folder.
- From the Workarea, click Content > Menus > Menus.
- The current language appears in the View field. To create the menu in this language, proceed to the next step. To change the new menu's language, select one from the View field drop-down.
- Click Add. The Add Menu screen appears.
- To complete the fields on the Add Menu screen, see Fields on the Add/Edit Menu Screen.
After creating the menu, you may assign items to it. See Adding a Menu Item .
Adding a Menu Item
There are 3 ways to add a menu item.
Adding a Menu Item via Content Folder
To add a menu item via a content folder:
- Navigate to the content folder that contains the menu to which you want to add items.
- Click View > Menu.
- In the View Language drop-down, select the menu's language.
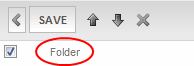
- Click the menu. The View Menu screen opens, displaying the menu's items. Submenus look like this:
 .
. - To add a new item to the menu, click Add Items.
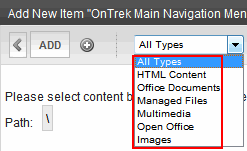
The Add New Item screen displays a list of items you can add to the menu. Use to the table below to select a type of menu item, and follow the steps to add it.

Menu item type
For more information, see
Content
Any library file: image, file, Quicklink, hyperlink to the menu
External hyperlink
Submenu
- After you insert menu items, you can view and modify information about them. To do that, click the item's title. Use the following information to complete the fields on the Edit Menu Item screen.—Fields—
Fields on the Add/Edit Menu Item Screen
Title—The name of the menu item. It appears on the Web page to indicate the item.
Image Link—You can have an image appear next to or instead of the menu title. For example:
To do this:
NOTE: Before beginning these steps, the image must reside in the library. If it does not, add it before proceeding. For more information, see Adding a File to the Library.
- Click image ().
- The library window opens.
- Navigate to the folder that contains the image you want to use.
- Click Insert (
 ) to insert it.
Replacing Title Text with Image
Alternatively, you can have the image replace the menu text, so that only the image appears on the menu. To do this, check the Use image instead of a title checkbox.

URL Link—After you create a menu, your developer links it to text or an image on a Web page by modifying a page template. When a site visitor moves the cursor over the text or image, the menu appears. In the example below, the menu appears when the site visitor moves the cursor over Products.
You can also assign a URL link to a menu using this field. If you do, and the user clicks the link text or image, he jumps to the specified page.
For example, in this field, you assign the product landing page,
siteroot/products.aspx. In the illustration above, if the user moves the cursor over Products, the assigned menu appears. However, if the user clicks Products , he jumps tositeroot/products.aspx.Entering the Path to the Landing Page
The path may be
- relative to site root, such as
siteroot/jobs.aspx - a static template path or a dynamic path, such as
wellness.aspx?id=40&wellness=Hemophilia - an external hyperlink, such as
http://www.example.com.
Description—Add a more detailed description for the menu.
Target—
Determines the type of window that appears when you click a link in the server control.
- _Self (default)—opens in same window.
- _Top—opens in parent window.
- _Blank—opens in new window.
- _Parent—opens in the parent frame.
Link—Use this field if you want to override this content's menu template by using the template specified in its Quicklink.
- Click image (
Adding a Menu Item via Menus Tab
- From the Workarea, click Content > Menus.
- Click the menu to which want to add a menu item.
- In the View Language drop-down list, select the menu's language.
- Click AddItems. The Add New Item screen displays a list of items you can add to the menu. Select a type of menu item, and follow the steps to add it.
- Content—Adding Content as a Menu Item
- Any library file: image, file, Quicklink, hyperlink to the menu—Adding a Library File as a Menu Item
- External hyperlink—Adding an External Hyperlink as a Menu Item
- Submenu—Adding a Submenu as a Menu Item
- After you insert menu items, you can view and modify information about them. To do that, click the item's title. See Also: Using Menus
Adding a Menu Item via Navigation Link on a Web Page
- Log in.
- Access the Web page that contains the link to display the menu.
- Place the cursor on the hyperlink that causes the menu to appear. The menu appears.
- Click Add. The Add Menu screen displays a list of items you can add to the menu.
- Select the type of menu item and follow the steps to add it.
- Content—Adding Content as a Menu Item
- Any library file: image, file, Quicklink, hyperlink to the menu—Adding a Library File as a Menu Item
- External hyperlink—Adding an External Hyperlink as a Menu Item
- Submenu—Adding a Submenu as a Menu Item
- After you insert menu items, you can view and modify information about them. To do that, click the item's title. See Also: Using Menus
Adding Content as a Menu Item
- Follow the directions in Adding a Menu Item via Content Folder, Adding a Menu Item via Menus Tab, or Adding a Menu Item via Navigation Link on a Web Page.
- Click the radio button next to Content Item.
- Click Next... The Add New Item screen appears, listing all content folders.
- By default, all content types are available. To limit your selection (for example, Word documents), click the content types drop-down and select a type.
- Content items in a folder appears below any subfolders. Click any subfolder to display its content.
- Check all content you want to add from any single screen to the menu.
IMPORTANT: If you check items then proceed to another screen before clicking Add, the items on the first screen are not added to the menu.
- Click Add.
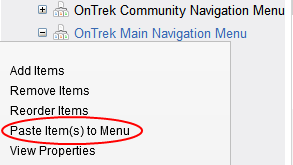
As an alternative, navigate to a content folder, click items to be assigned, right click the mouse and select Copy. Then, locate the menu, right click the mouse, and select Paste Items to Menu.
The View Menu screen reappears, showing the new content.
- To access the Edit Menu Item screen for the new content, hover the cursor over the title, then click. The Edit Menu Item screen lets you assign additional information to the menu item, such as the target window. See Using Menus.
- Continue to add menu items as needed.
Adding a Library File as a Menu Item
To add a library file as a menu item via a content folder or menus tab:
- Follow the directions in Adding a Menu Item via Content Folder, Adding a Menu Item via Menus Tab, or Adding a Menu Item via Navigation Link on a Web Page.
- Click the radio button next to Library Asset.
- Click Next. The Add New Item screen appears. Enter a title for the library file that will appear on the menu.
- Click Browse Library. The library screen opens.
- In the right frame, select the type of file to insert (image, hyperlink, and so on).
NOTE: To insert assets, the menu’s folder must contain library assets. However, you can insert library assets from other folders for which you have permission.
- Select a library asset and click Insert. The Add New Item screen reappears.
- Click Save.
Adding an External Hyperlink as a Menu Item
To add an external hyperlink as a menu item via a content folder or the Menus tab:
- Follow the directions in Adding a Menu Item via Content Folder, Adding a Menu Item via Menus Tab, or Adding a Menu Item via Navigation Link on a Web Page.
- Click External Hyperlink.
- Click Next. The Add New Item screen appears.
- Complete the fields as needed.
- Title—Title of the new menu item.
- URL Link—The external hyperlink's URLUniversal Resource Locator. For example,
www.example.com.
- Click Save.
NOTE: When you add an external hyperlink menu item, the URL does not get added to the library nor is an ID assigned to it. So, when you save the menu item, it is not added to the Ektron database nor can it be retrieved for future use.
Adding a Submenu as a Menu Item
- Follow the directions in Adding a Menu Item via Content Folder, Adding a Menu Item via Menus Tab, or Adding a Menu Item via Navigation Link on a Web Page.
- Click Sub menu. The Add Menu screen appears.
- Complete the fields using Using Menus as a reference.
- Click Save.
Adding New Content to a Menu via Navigation Link on a Web Page
NOTE: You can only use this feature after your Web developer has modified a page template to display the menu. For more information, see Introduction to Menu Server Controls.
- Access the Web page that contains the link to display the menu.
- Place the mouse on the hyperlink that causes the menu to appear. A menu appears.
- Click Add. The Add Menu screen opens, displaying items you can add.
- Refer to the table below for selecting a menu item and follow the steps to add it.
- Content—Adding Content as a Menu Item
- Any library file: image, file, Quicklink, hyperlink to the menu—Adding a Library File as a Menu Item
- External hyperlink—Adding an External Hyperlink as a Menu Item
- Submenu—Adding a Submenu as a Menu Item
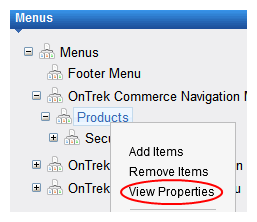
Editing a Menu's Properties
This section describes each option for editing a menu's properties.
Editing a Menu's Properties via its Content Folder
- From the Workarea, navigate to the content folder that contains the menu.
- Click View > Menu.
- Click the menu you want to edit.
- If appropriate, click the submenu that you want to edit.
- Click Properties (
 ). The View Menu screen appears.
 - Click Edit Menu.
- Update the fields on the screen by referencing Fields on the Add/Edit Menu Screen.
- Click Save.
Editing a Menu's Properties via Menus Tab
- From the Workarea, click Content > Menus.
- Click the menu you want to edit.
- Click Properties (). The View Menu screen appears.
Alternatively, hover the cursor over the menu in the left panel, right click the mouse, and click View Properties.
- Click EditMenu.
- Update the fields on the screen by referencing Fields on the Add/Edit Menu Screen.
- Click Save.
Editing a Menu's Properties via Navigation Link on a Web Page
- Navigate to the Web page that contains the menu link.
- Click the link. The menu appears.
- Click Edit Menu. The menu's View Menu screen appears.
- Click Properties ().
- Click Edit Menu.
- Update the fields and by referencing Fields on the Add/Edit Menu Screen.
- Click Save.
Viewing a Menu
Just like editing a menu, you can view a menu via...
- its content folder
- menus tab
- navigation link on a Web page
When viewing a menu via the content or menu folder, you get an internal view of information entered by menu creator. When viewing via a navigation link on a Web page, you get an external view of the menu, as seen by anyone navigating website.
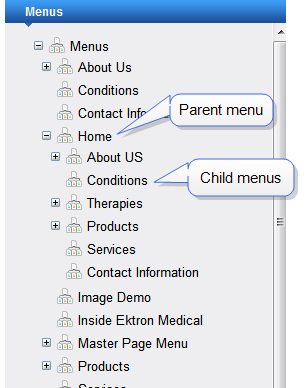
Viewing a Menu via the Menus Tab
- From the Workarea, click Content > Menus. The View All Menus screen appears.
- Click the menu you want to view. The menu’s options appear.
NOTE: If your Workarea language is set to all languages, you cannot view child menus—only parent menus. To view a child menu, select its parent menu's language, using the View > Language menu option.
Reordering Menu Items
- Navigate to the View Menu screen for the menu that you want to rearrange. See Viewing a Menu.
- From the toolbar, click Reorder (
 ).
).Alternatively, hover the cursor over the menu in the left panel, right click the mouse, and click Reorder Items.
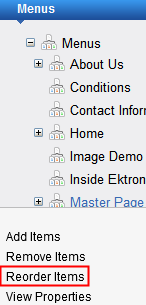
The Reorder Items screen appears.
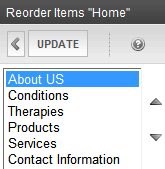
- Click the item you want to move.
- Click the up arrow to move it up, or the down arrow to move it down.
- When finished, click Save.
Deleting a Menu
- Access the View Menu screen, as described in Viewing a Menu via its Content Folder or Viewing a Menu via the Menus Tab.
- Click the menu you want to delete.
- Click Delete (
 ). A confirmation message appears.
 - Click OK to delete the menu.
NOTE: Deleting a menu automatically deletes all menu items associated with it. Do not confuse the menu link with the item itself. For example, deleting a menu deletes its links to content but has no effect on the content.
Deleting a Menu Item
- Access the View Menu screen, as described in Viewing a Menu via its Content Folder or Viewing a Menu via the Menus Tab.
- Click Remove Items (
 ).
). - Check the box next to items that you want to remove.
- Click Remove.
Working with Menus in a Multi-Language System
NOTE: For background information about supporting multiple languages on your website, see Working with Multi-Language Content.
You can create an edition of any menu in every supported language. When a site visitor selects a language and clicks a menu link, Ektron displays the menu in that language if it is available. If it is not available, nothing appears.
Before creating or translating a menu, you should create or translate all content that will be on the menu. In this way, you can link this content to the new menu. However, after creating a menu, you can add new items to it.
Translating a Menu
To translate a menu into any supported language: You can navigate to the menu via the website or from the Workarea. Each procedure is described below.
By Navigating the Site
- Sign on to an Ektron website.
- Select the menu’s current language.
- Navigate to the page that has the menu you want to translate.
- Click the menu and the Edit Menu option.
The View Menu screen appears for the selected menu.
- From the Add drop-down list, select the language into which you want to translate the menu.
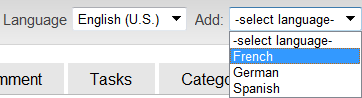
The Add Menu screen appears.
- Complete the screen for the menu in the selected language. See Fields on the Add/Edit Menu Screen.
- Click Save. The View Menu screen reappears. Now, the View drop-down displays the menu’s new language.

- Add items to the menu. See Adding a Menu Item . If adding content, you can only insert an item in the selected language. Later, you can add more menu items, edit them, delete them, view them, and so on.
By Accessing the Menus Report Screen
- From the Workarea screen, click Content > Menus.
- Click the menu you want to translate. The View Menu screen appears for the selected menu.
- From the Add drop-down list, select the language into which you want to translate the menu.
The Add Menu screen appears.
- Complete the screen for the menu in the selected language. See Fields on the Add/Edit Menu Screen.
- Click Save. The View Menu screen reappears. Now, the View drop-down displays the menu’s new language.
- Add items to the menu. See Adding a Menu Item . If adding content, you can only insert an item in the selected language. Later, you can add more menu items, edit them, delete them, view them, and so on.
Creating a Menu in Any Language
- From the Workarea screen, click Content > Menus > Menus.
- From the language drop-down list, select the new menu’s language.
- Create the menu. See Adding a Menu via the Menus Tab.
Assigning Folders or Templates to a Menu
Effect of Assigning a Folder to a Menu
If all of the following conditions apply...
- you assign a folder to a menu
- a user navigates to any content item that resides in the folder
- a Flex Menu whose
EnableSmartOpenproperty is true appears on the screen
...the Flex Menu automatically displays the items on the associated submenu.
NOTE: Navigation to the content can consist of clicking a quicklink, a menu option, a list summary item, the result of a search, and so on.
In effect, you are instructing Ektron to expose a menu whenever a content item that resides in a selected folder appears. As a result, a user looking for a specific item sees similar items.
As an example, assume your website sells books, and folders are organized by genre. One of your folders is “Teen Fiction.” You create a submenu that contains the top 5 sellers in “Teen Fiction.” You then associate the Teen Fiction folder with that submenu. When a site visitor finds views a book in that category, a Flex Menu in the page’s left column displays the top 5 Teen Fiction titles.
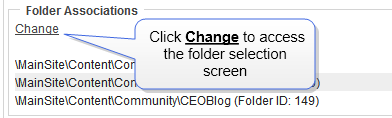
Using the Select Folder Screen
The Select Folder screen lets you assign new folders to a menu, reorder folders, and delete folders from the menu association. These tasks are described below.
When you click Change below Folder Associations on the Edit menu screen, the Select Folder screen appears.
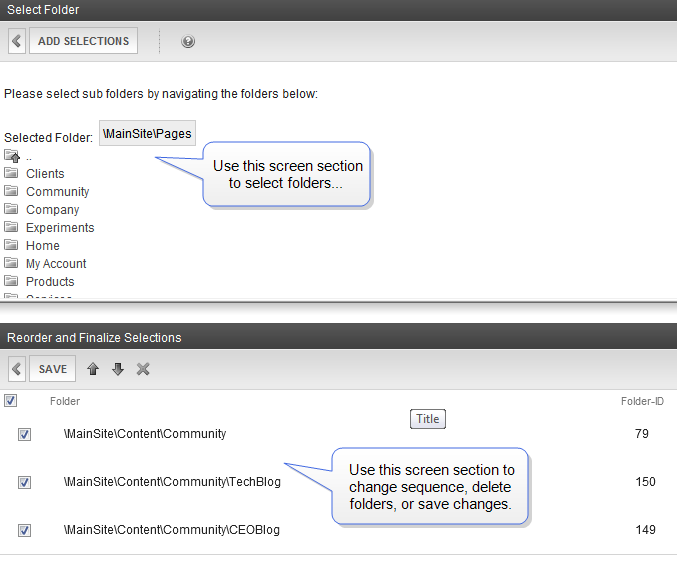
The following table describes tasks you can perform on these screens.
|
Task |
Instructions |
|
Add folder to list |
|
|
Remove folder from list |
|
|
Remove all folders from list |
|
|
Move a folder up or down on the list NOTE: The folders' sequence has no impact on how they are used. It only affects the appearance of the Select Folders screen. |
|
|
Save changes and return to Edit Menu screen |
Click Save. |
|
Exit screen; do not save changes |
Click Exit ( |
 ).
).Effect of Assigning a Template to a Menu
If all of the following conditions apply....
- you assign a template to a menu
- a user navigates to any content item that uses the template
- a Flex Menu whose
EnableSmartOpenproperty is true appears on the screen
...the Flex Menu automatically displays the items on the associated submenu.
NOTE: Navigation to the content item can consist of clicking a quicklink, a menu option, a list summary item, the result of a search, and so on.
In effect, you are instructing Ektron to expose a menu whenever a content item that uses one or more selected templates appears on the screen. As a result, a user who begins looking for a specific content item sees similar items.
As an example, assume your website sells books, and your templates are organized by genre. One of your templates is “Teen Fiction.” You create a submenu that contains the top 5 sellers in “Teen Fiction.” You then associate the Teen Fiction template with that submenu. If a site visitor visit a page describing the book, the Flex Menu in the page’s left column displays the 5 top Teen Fiction titles.
Assigning a Template to a Menu
- Move to the Template Associations area of the Edit menu screen.
- In the box on the right, enter the template that you are assigning to this menu. It can be an Ektron template, or any file that you wish.
- Click Add.
To later change or remove the template, select it then click Change or Remove.
Introduction to Menu Server Controls
IMPORTANT: Starting from release 8.6, the Flex Menu and Menu server controls were replaced by the FrameworkUI: <ektron:MenuView> templated server control. If you are already using the Flex Menu and Menu server controls, you can continue to do so, but Ektron recommends using current versions of functionality.
Managing menus is a two-step process. The previous section describes the first step, which is how Ektron users create and update menus. The second step involves a developer placing a menu server control on a Web form. The server control manages the display of the menu on your website. This section introduces concepts that affect all of them, and explains the differences between them.
Ektron provides 2 menu server controls: Flex Menu and Menu
Contrasting Menu Server Controls
Appearance
| Type | Appearance |
|---|---|
|
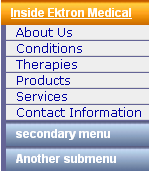
Flex |
(Other styles are available) |
|
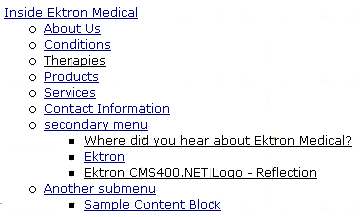
Menu |
|
 or
or 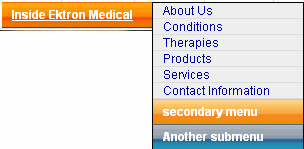
Properties
|
Property |
Flex Menu |
Menu |
|
|
|
|
|
Shutter menu (When you click a menu, it opens directly below the menu title) |
|
|
|
Secondary menu opens when cursor hovers over it |
(alternative: secondary menu opens when clicked) |
|
|
Starts out collapsed; expands as site visitor selects secondary menu |
|
|
|
All menu levels open when page displays |
|
|
|
Can display secondary menu to the right of the root menu, instead of directly below it |
|
|
|
How appearance is modified |
Server control properties and style sheet |
Xslt and style sheet |
|
How behavior is modified |
Xslt |
Xslt and style sheet |
|
Option to launch menu links in a new window |
|
|
