 Confirmations
Registration confirmations (opt-in emails) are sent in real-time via the Episerver Campaign transaction APIStands for "application programming interface". The API specifies how some software components should interact with each other, such as accessing a database or computer hardware, or easing the work of programming graphical user interface components. APIs often are in the form of a library that includes specifications for routines, data structures, object classes, and variables. See also: https://world.episerver.com/documentation/class-libraries/ when a recipient registers for your newsletter. Once started, registration confirmations remain in Sending status.
To open the overview, open the start menuMain screen in Episerver Campaign, where the available options are grouped together. and select Campaigns > Confirmations. Registration confirmations appear in the top half of the window.
Selecting a media type
You can select the following media types for registration confirmations, each of which are sent via different channels. The recipient list for a confirmation must be compatible with the delivery channel.
| Delivery channel | Sends registration confirmation via | Required recipient list type |
|---|---|---|
| Mail or multiple list | ||
| message via post (letter or postcard) | Print or multiple list | |
| SMS | SMS | SMS or multiple list |
Viewing status
The overview displays a status for each registration confirmation.
- Sending. Confirmation is active and sending opt-in emails to newly registered recipients.
- Canceled. Confirmation is canceled and cannot be restarted.
To resume the sending process, contact customer support.
Registration confirmation actions
You can perform the following actions for registration confirmations.
- Edit. To modify a registration confirmation, select it and click Edit. See Creating and editing campaigns.
- Cancel. To cancel the sending of an active registration confirmation (in Sending status), select it and click Cancel.
You cannot restart canceled registration confirmations. To resume the sending process, contact customer support.
- Analyze. Select an active registration confirmation and click Analysis to check how many opt-in mails were sent via a registration confirmation. You can also see additional parameters such as openings, clicks, bounces or unsubscribers.
Opt-in processes
To enable this feature, contact customer support.
Using opt-in processes, you can create and manage registration confirmations (opt-in emails).
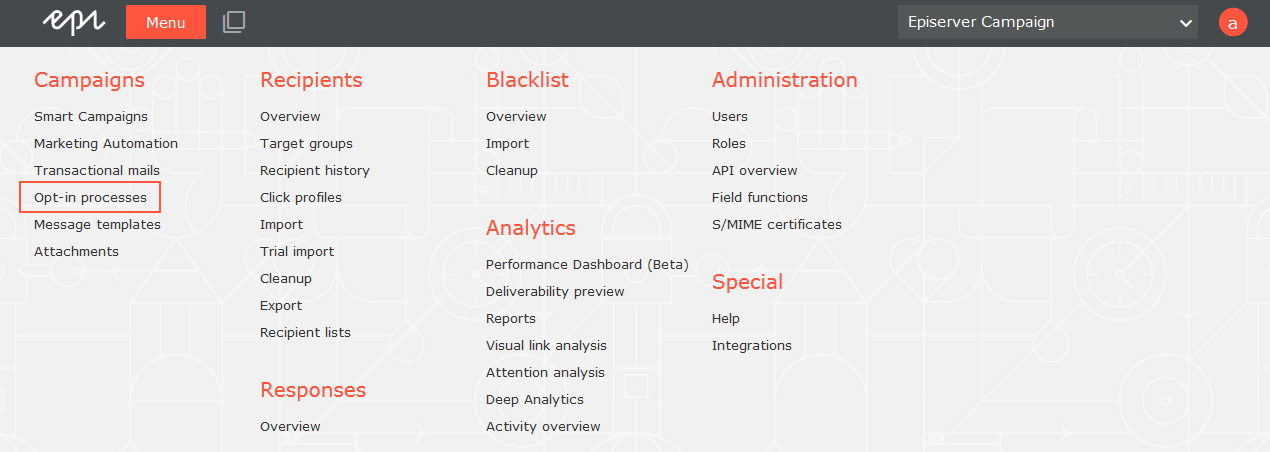
To open the opt-in process overview, open the start menuMain screen in Episerver Campaign, where the available options are grouped together. and select Campaigns > Opt-in processes.

Creating an opt-in process
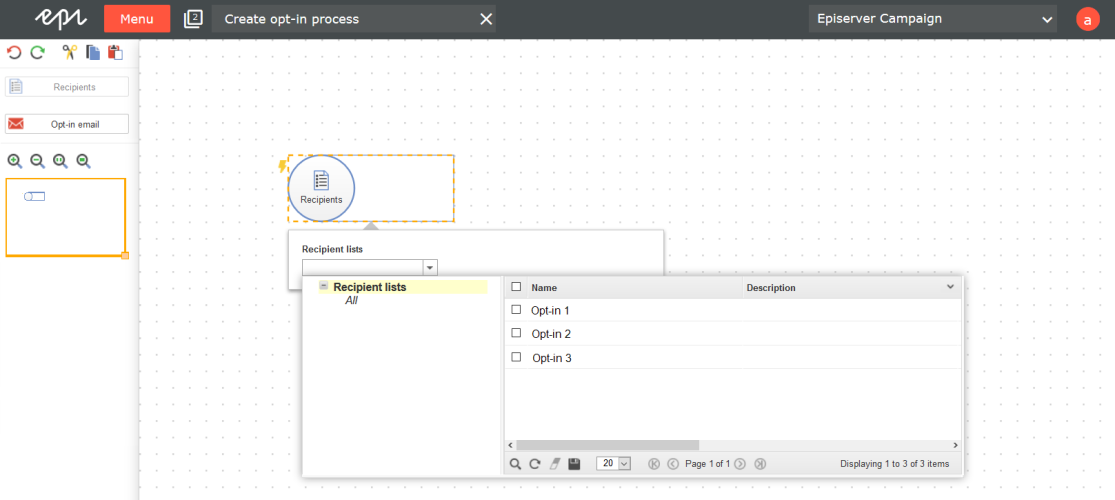
- Click Create.
- Drag the Recipients node from the left action area to the working area on the right.
- Select one or more recipient lists you want to send the opt-in email to.
You can only use recipient lists of the Opt-in type.
- Drag the Opt-in email message node from the left action area to the working area on the right.
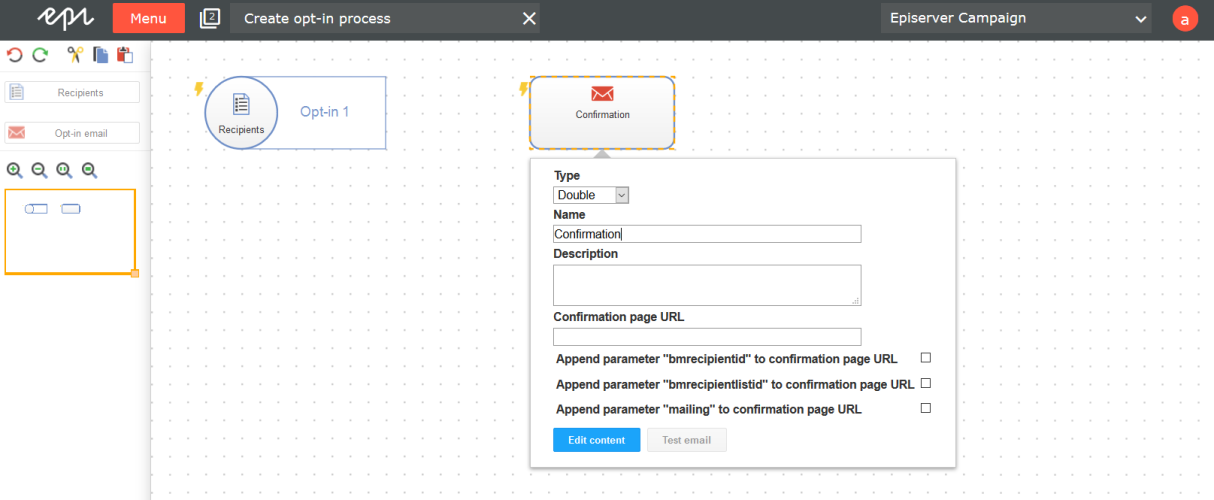
- Double-click the message node and configure the opt-in process.
- Type. In the drop-down list, select the opt-in type. Double is selected by default.
For information on the different opt-in methods, see Opt-in.
- Name. Enter a name for the opt-in process.
- Description. Optional: Enter a description for the opt-in process.
- Confirmation page URL. Enter the URL of the confirmation page.
The confirmation page URL is required for opt-in processes of the Double type.
- Optional: You can append the parameters bmrecipientid, bmrecipientlistid and mailing to the confirmation page URL and use them for tracking and analysis. To do this, select the respective check box.
- Type. In the drop-down list, select the opt-in type. Double is selected by default.
- Edit the opt-in email by clicking Edit content. See Editing mailing content.
Opt-in emails for opt-in processes of the Double type must contain a double opt-in link (using the field function
{Double Opt-in Link}). - Connect the nodes.
- Click Save and close.
Newly created opt-in processes start automatically and are in Sending status. If you want to cancel a running opt-in process, select it in the opt-in process overview and click Cancel. See Opt-in process actions.
Editing an opt-in process
- Select an opt-in process and click Edit.
- Modify the opt-in process as described in Creating an opt-in process.
- Click Save and close.
Opt-in process actions
In the opt-in process overview, you can perform the following actions:
- Start. Start a previously canceled opt-in process. The opt-in process must be in Cancelled status.
You can view the opt-in process status in the Status column of the opt-in process overview.
- Cancel. Cancel an active opt-in process. The opt-in process must be in Sending status.
- Analyze. Check how many opt-in emails were sent. You can also see additional information such as openings, clicks, bounces or unsubscribers.
- Send test message. Send a test message to check the appearance of the mailing before the actual dispatch. See Test message.


