 Sending transactional mails
This topic is for administrators and developers with administration access rights in Microsoft Dynamics.
This topic describes how to send transaction mails An email triggered by a recipient action (such as an order or purchase) or event (such as an anniversary). It is sent out subsequent to the event. in Optimizely Campaign from Microsoft Dynamics CRM using a workflow in CRM. After sending, response data (opens, clicks) are automatically transferred into CRM.
Prerequisites
- Configuration of the integration completed, see Configuration.
- Campaign mailing prepared in Optimizely Campaign.
- The ID of the campaign mailing to be sent. You can find the ID under Transactional mails in Optimizely Campaign. Select the column ID in the drop-down list to the right.
- The authorization code of the recipient list used by the transactional mailing.
Configuring transactional mailings and workflows
Before sending a transactional mailing from Optimizely Campaign, you need to configure the transactional mailing in Microsoft Dynamics CRM. You can send these mailings to contacts, accounts or leads even without advertising consent. You also need to define a workflow to trigger the transactional mailing.
Configuring the transactional mailing
- Open Microsoft Dynamics CRM and select Settings > Configurations.
- Click New.
- Enter a name for the configuration.
- In the Value field, define the configuration using an XML format.
The fields
<authCode>and<bmMailingID>are mandatory.For
<authCode>, enter the authorization code for the transactional mailing's recipient list. For<bmMailingId>, enter the mailing ID of the transactional mailing.Other fields can be optionally linked, as long as the information is available in CRM.
<root>
<authCode>authorization.Code</authCode>
<bmMailingId>mailing.ID</bmMailingId>
<firstname>object.firstname</firstname>
<lastname>object.lastname</lastname>
<salutation>object.salutation</salutation>
</root>
When sending from another entity except contact, lead or account, a lookup references to the connected
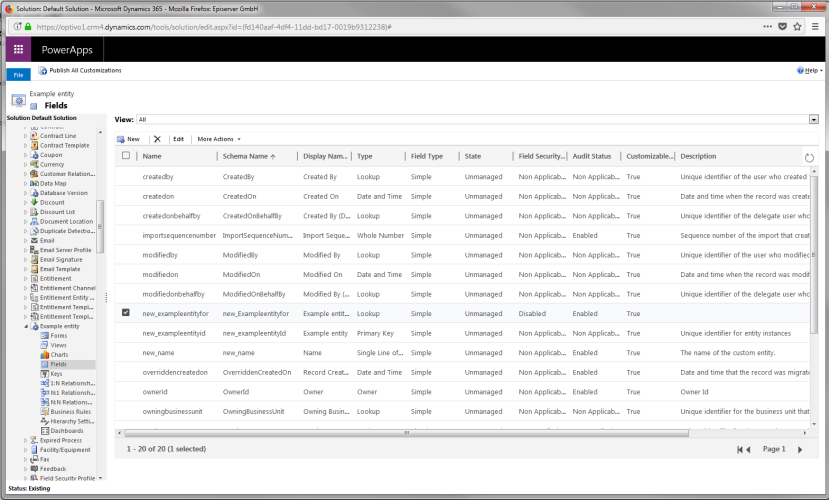
bmRecipientId. Furthermore, data fields in contact, lead or account are integrated via lookups.<root> <authCode> Authorisierungs-Code </authCode> <bmMailingId> Mailing-ID </bmMailingId> <bmRecipientId>object.new_exampleentityfor.emailaddress1</bmRecipientId> <dynamicsId>object.new_exampleentityfor.contactid</dynamicsId> <first_name>object.new_exampleentityfor.firstname</first_name> <last_name>object.new_exampleentityfor.lastname</last_name> </root>You can find the name of the lookup element that is inserted between the
objectand the field name (for example,contactid) in the Fields overview. Search for the name of the field in which the lookup for contact, lead, or account is performed. In the example, the name is new_exampleentityfor. - Click Save & Close.
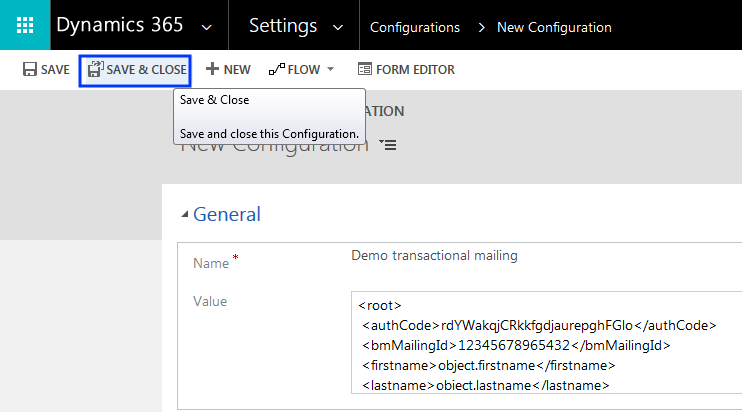
The configuration can be updated and saved if needed.
Configuring the workflow
- Open Microsoft Dynamics CRM and select Settings > Processes.
- Click New.
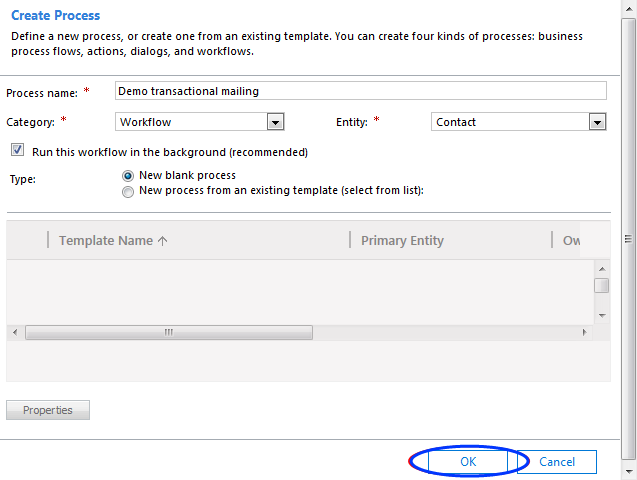
- Enter a name in Process name.
- Under Category, select Workflow.
- As Entity, select Contact, Lead or Company.
- Keep the selection Run this workflow in the background.
- Select New blank process, if you are not using an existing workflow as template,
- Click OK.
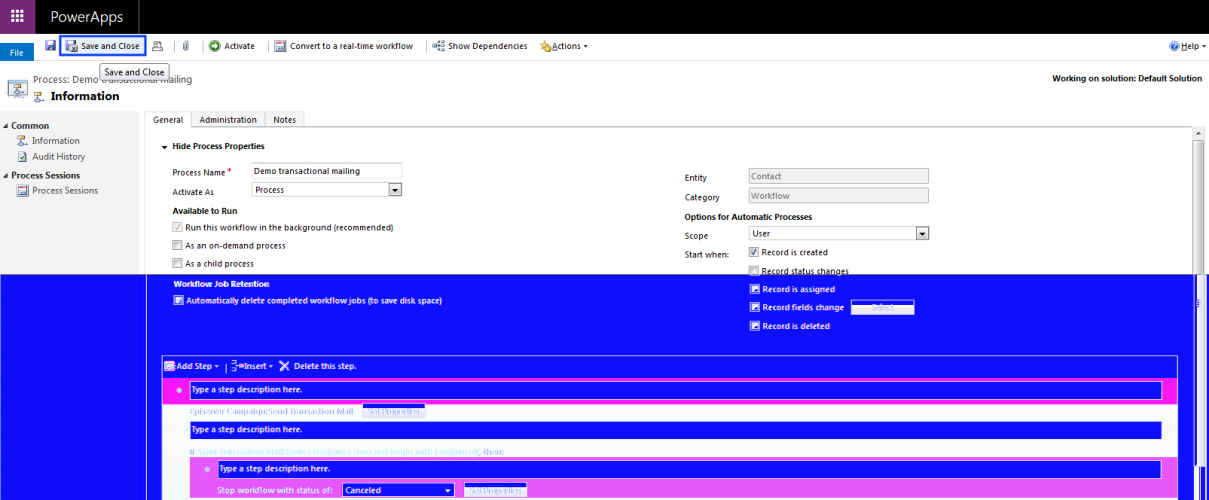
- Under Activate As define if the workflow is to be created as process or as template.
- Under Available to Run, select the dependencies of the process. For manual start, select As an on-demand process.
- Under Workflow Job Retention, define if the workflows should be automatically deleted after completion.
- Under Options for Automatic Processes, define who can start the process.
- Under Start when, define which action should trigger automatic dispatch. If nothing is selected, the dispatch is started manually in CRM.
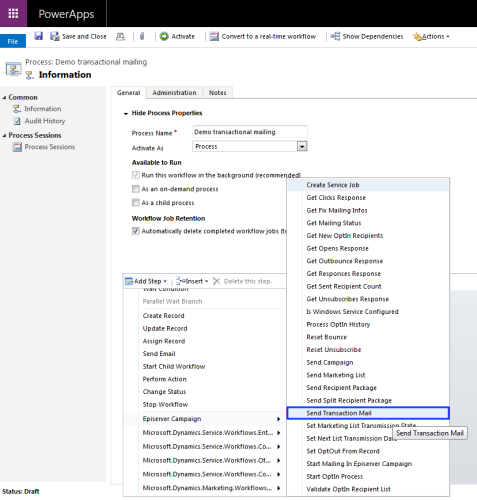
- Select Add Step > Episerver Campaign > Send Transaction Mail.
- Click Set Properties.
- In the Value column, search for and select the previously created configuration.
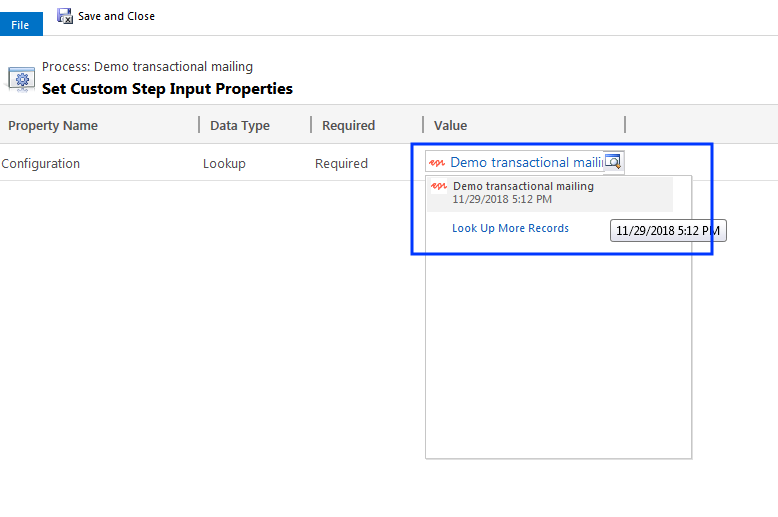
- Click Save and Close.
Checking return values of the process
You should add error handling steps, configuring how the process should handle different return values of incorrectly sent transactional mails. Transactional mailings are sent using the sendtransactionmail operation of the HTTP API. Here is an example for canceling an unsuccessful process.
- In the Process window in Microsoft Dynamics CRM, click Add Step > Check Condition.
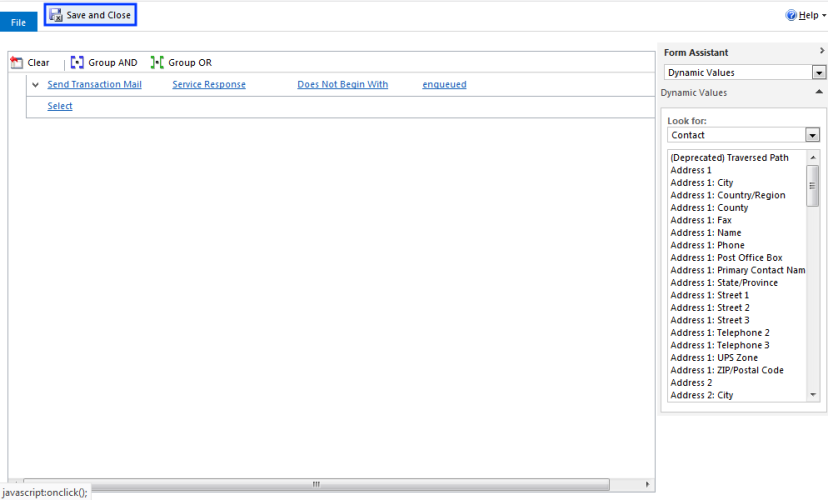
- Click <condition> (click to configure).
- Click Select.
- Click Send Transaction Mail.
- Click Service Response in the second drop-down list.
- Click Does Not Begin With in the third drop-down list.
- Click Enter value and enter the return value enqueued.
- Click Save and Close.
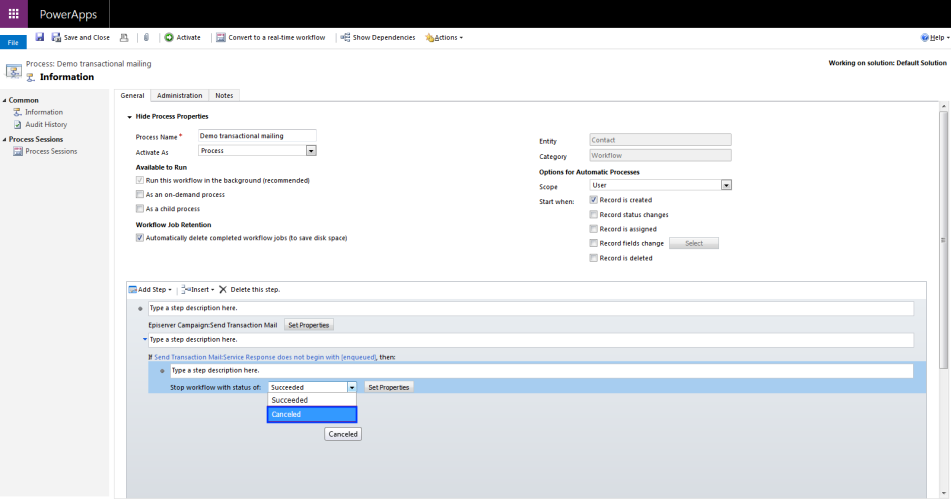
- Click Select this row and click Add Step.
- Select Add Step > Stop Workflow.
- Select Canceled in the status drop-down list.
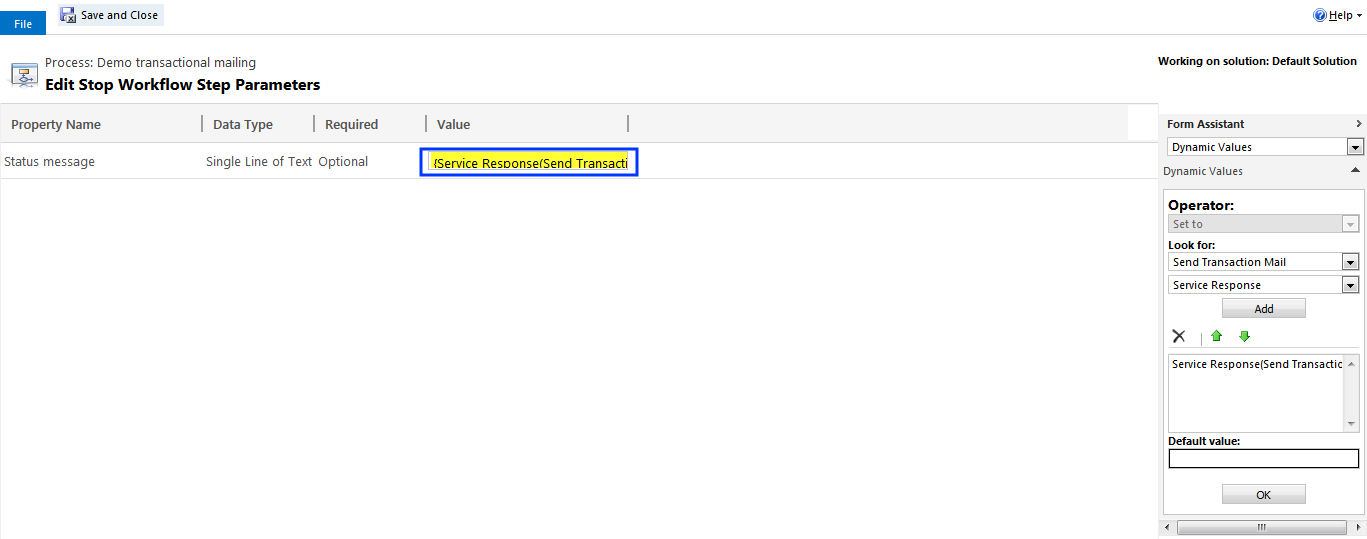
- Click Set Properties.
- Click in the Value column.
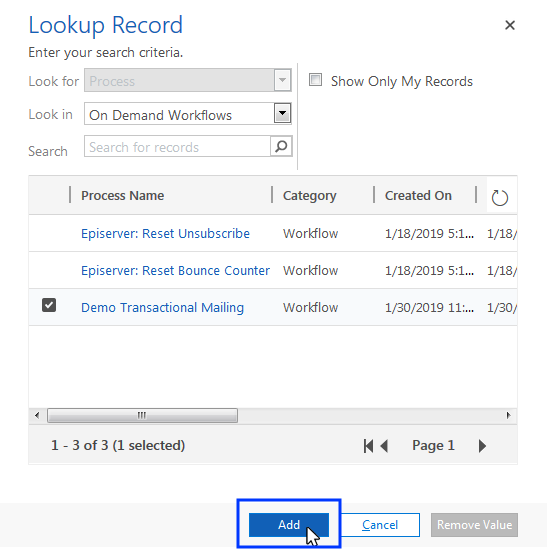
- In the drop-down list, select Look for:> Send Transaction Mail.
- In the drop-down list, select Service Response.
- Click Add.
- Click OK.
- Click Save and Close.
- Under Process in the menu bar, click Convert to a real-time workflow.
- Click Activate, and Activate in the Process Activate Confirmation dialog box.
- In the Process window, click Close.
Send out transactional mailing
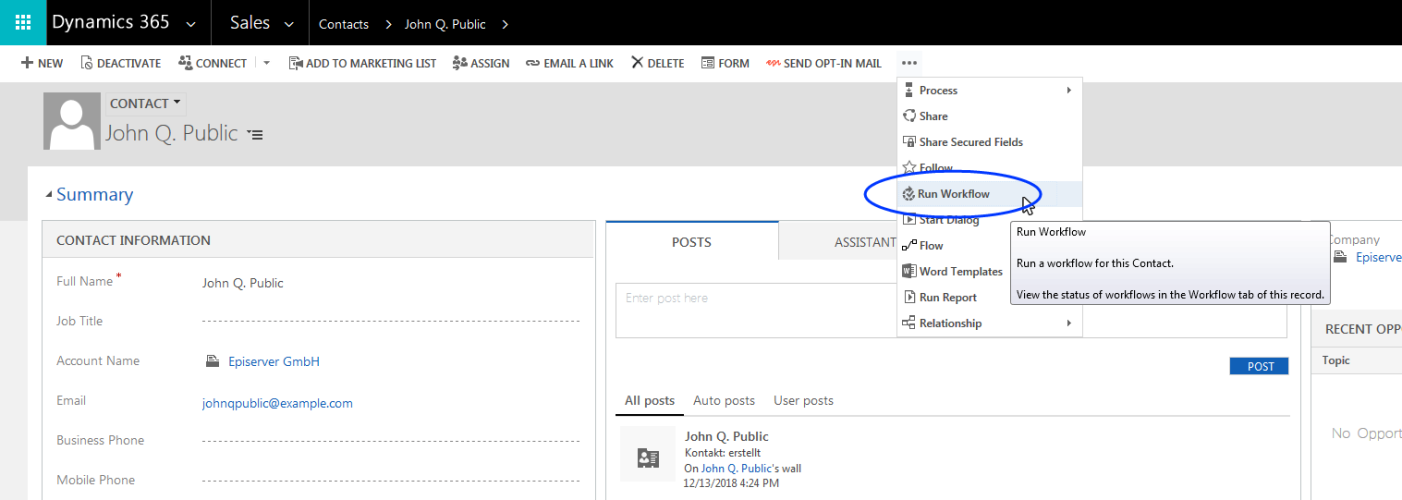
The workflow is now fully created, activated and starts according to the preconfigured action or may be triggered manually. A transaction mailing is started manually from the entity specified in the process.

