An encrypted mode is used when moving files from your computer onto the server to protect your data from unauthorized access during transfer. SCP, which stands for Secure Copy Protocol, ensures encryption and proper data transfer. To use this encryption method, you will need an SCP program installed on your computer, access data for the server and a key for server authentication.
This page provides instructions on how to install and set up the program WinSCP, which you can download for free.
Downloading and installing WinSCP
To download WinSCP, perform the following steps:
- Click the following link: http://winscp.net/eng/download.php.
- Click Installation package.
- Perform the installation.
Creating a key pair
To establish a connection to the servers, each user will need a key pair, which consists of a so-called public key and a private key. To create a key pair, perform the following steps:
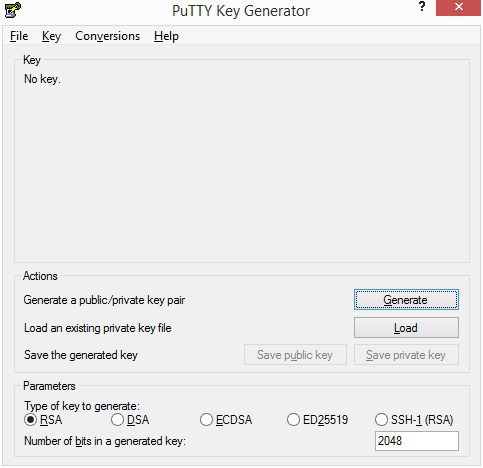
- Run the program PuTTYGen, which is part of WinSCP.
- In the Parameters area, choose the key type RSA and enter the value 2048 in the Number of bits in a generated key field.
Remarque: Make sure to select the correct key type. Episerver only supports the key type RSA.
- Click Generate.
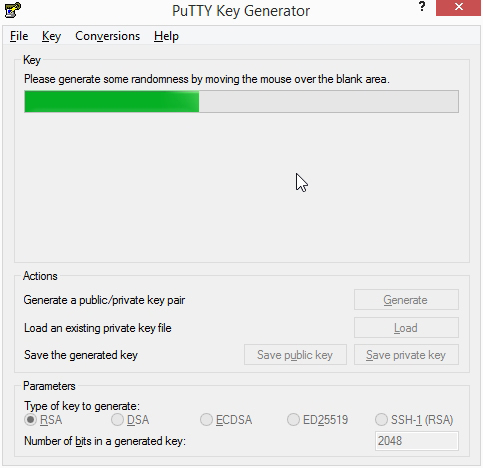
- While the server is generating the keys, you will be requested to make several random movements with the mouse across a gray field in the window. These arbitrary movements will generate random values for the keys. The bar near the top of the window indicates the progress of the operation.
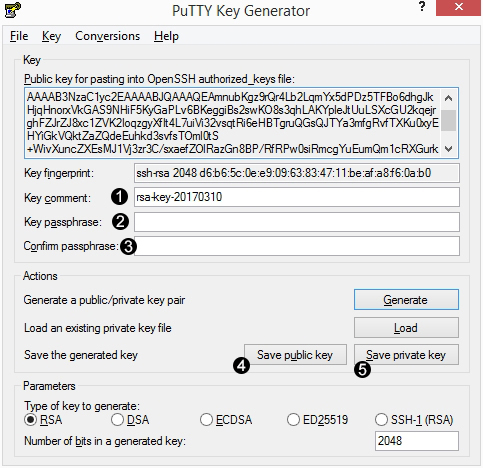
- Once the keys are generated, this window will appear.
- Fill in the fields as follows:
- Key comment (1): Enter a brief description, such as "Episerver Campaign-<your_companyname>".
- Key passphrase (2): Enter a password for the key.
- Confirm passphrase (3): Enter the password a second time to confirm.
- Click Save public key (4) to save it.
- Click Save private key (5) to save it.
Attention: Secure passwords
Use an eight-digit (or, better yet, a 16-digit) password containing letters, numbers as well as special characters.
Transmitting keys to Episerver
The public key and the key fingerprint must be sent to Episerver separately:
- Copy the public key and send it by email to customer support.
- Copy the key fingerprint and send it in a separate email to customer support.
We will then send you a confirmation. Your SCP access is now active.
Attention: Protect your keys from unauthorized access
Protect your keys from access by unauthorized persons and keep them in a safe place. If the keys should fall into the wrong hands, immediately notify Episerver and generate a new key pair in the manner previously described.
Establishing a connection through WinSCP
Once your keys have been activated, you can establish a connection to the servers via WinSCP. To do so, perform the following steps:
- Launch the WinSCP program.
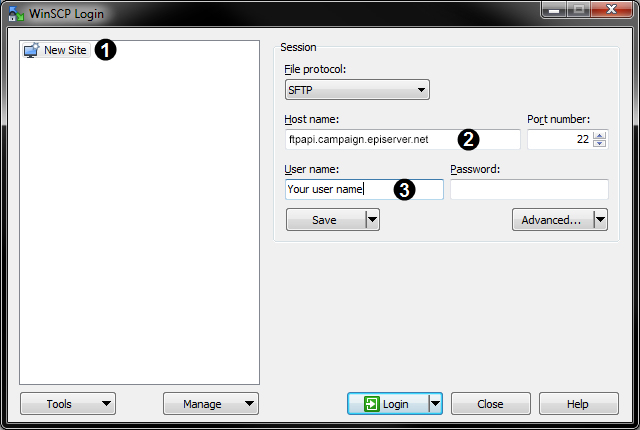
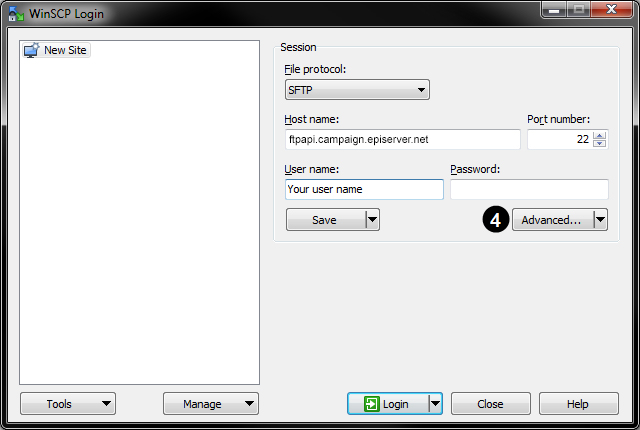
- In the login window, click New Site (1).
- Fill in the fields as follows:
- Host name (2). ftpapi.campaign.episerver.net
- User name (3). Episerver will provide you with this
- Click Advanced... (4). The Advanced Site Settings window opens.
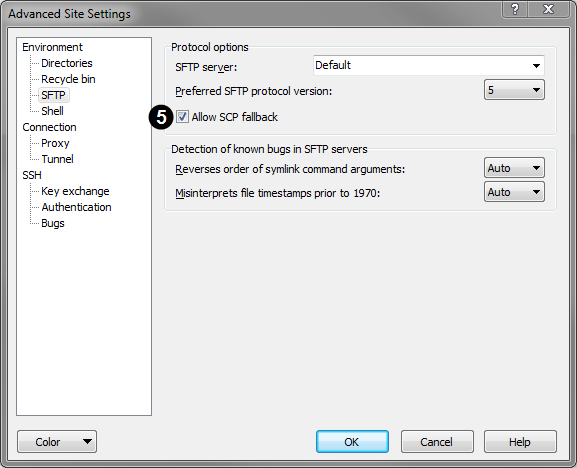
- On the left side under Environment, click SFTP and on the right side activate the Allow SCP fallback check box (5).
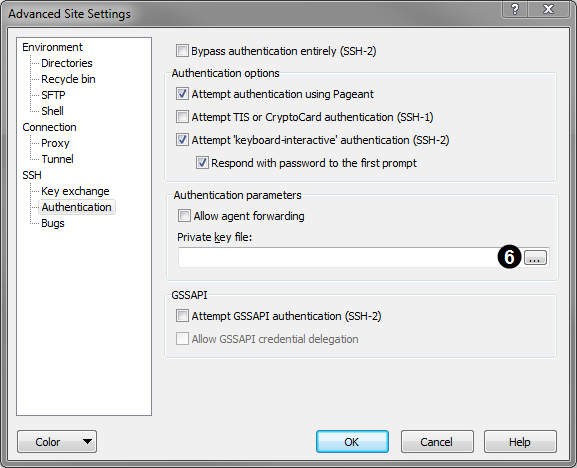
- On the left side under SSH, click Authentication and on the right side in the Private key file field, click Browse (...) and select the private key previously generated. (6).
- Click OK.
- Click Save, enter a name for the connection and click OK.
- In the WinSCP login window, select the name and click Login to establish a connection.
